Numitron Watch
Sometime in early July 2025
Lets make a numitron watch from scratch. Im planning on using 2 IV9 numitron tubes and a STM32L for ultra low battery. My initial plan is to use a 3V CR2032, but that changed to a 500maH Lipo battery couple weeks later. Here is my prototype setup:
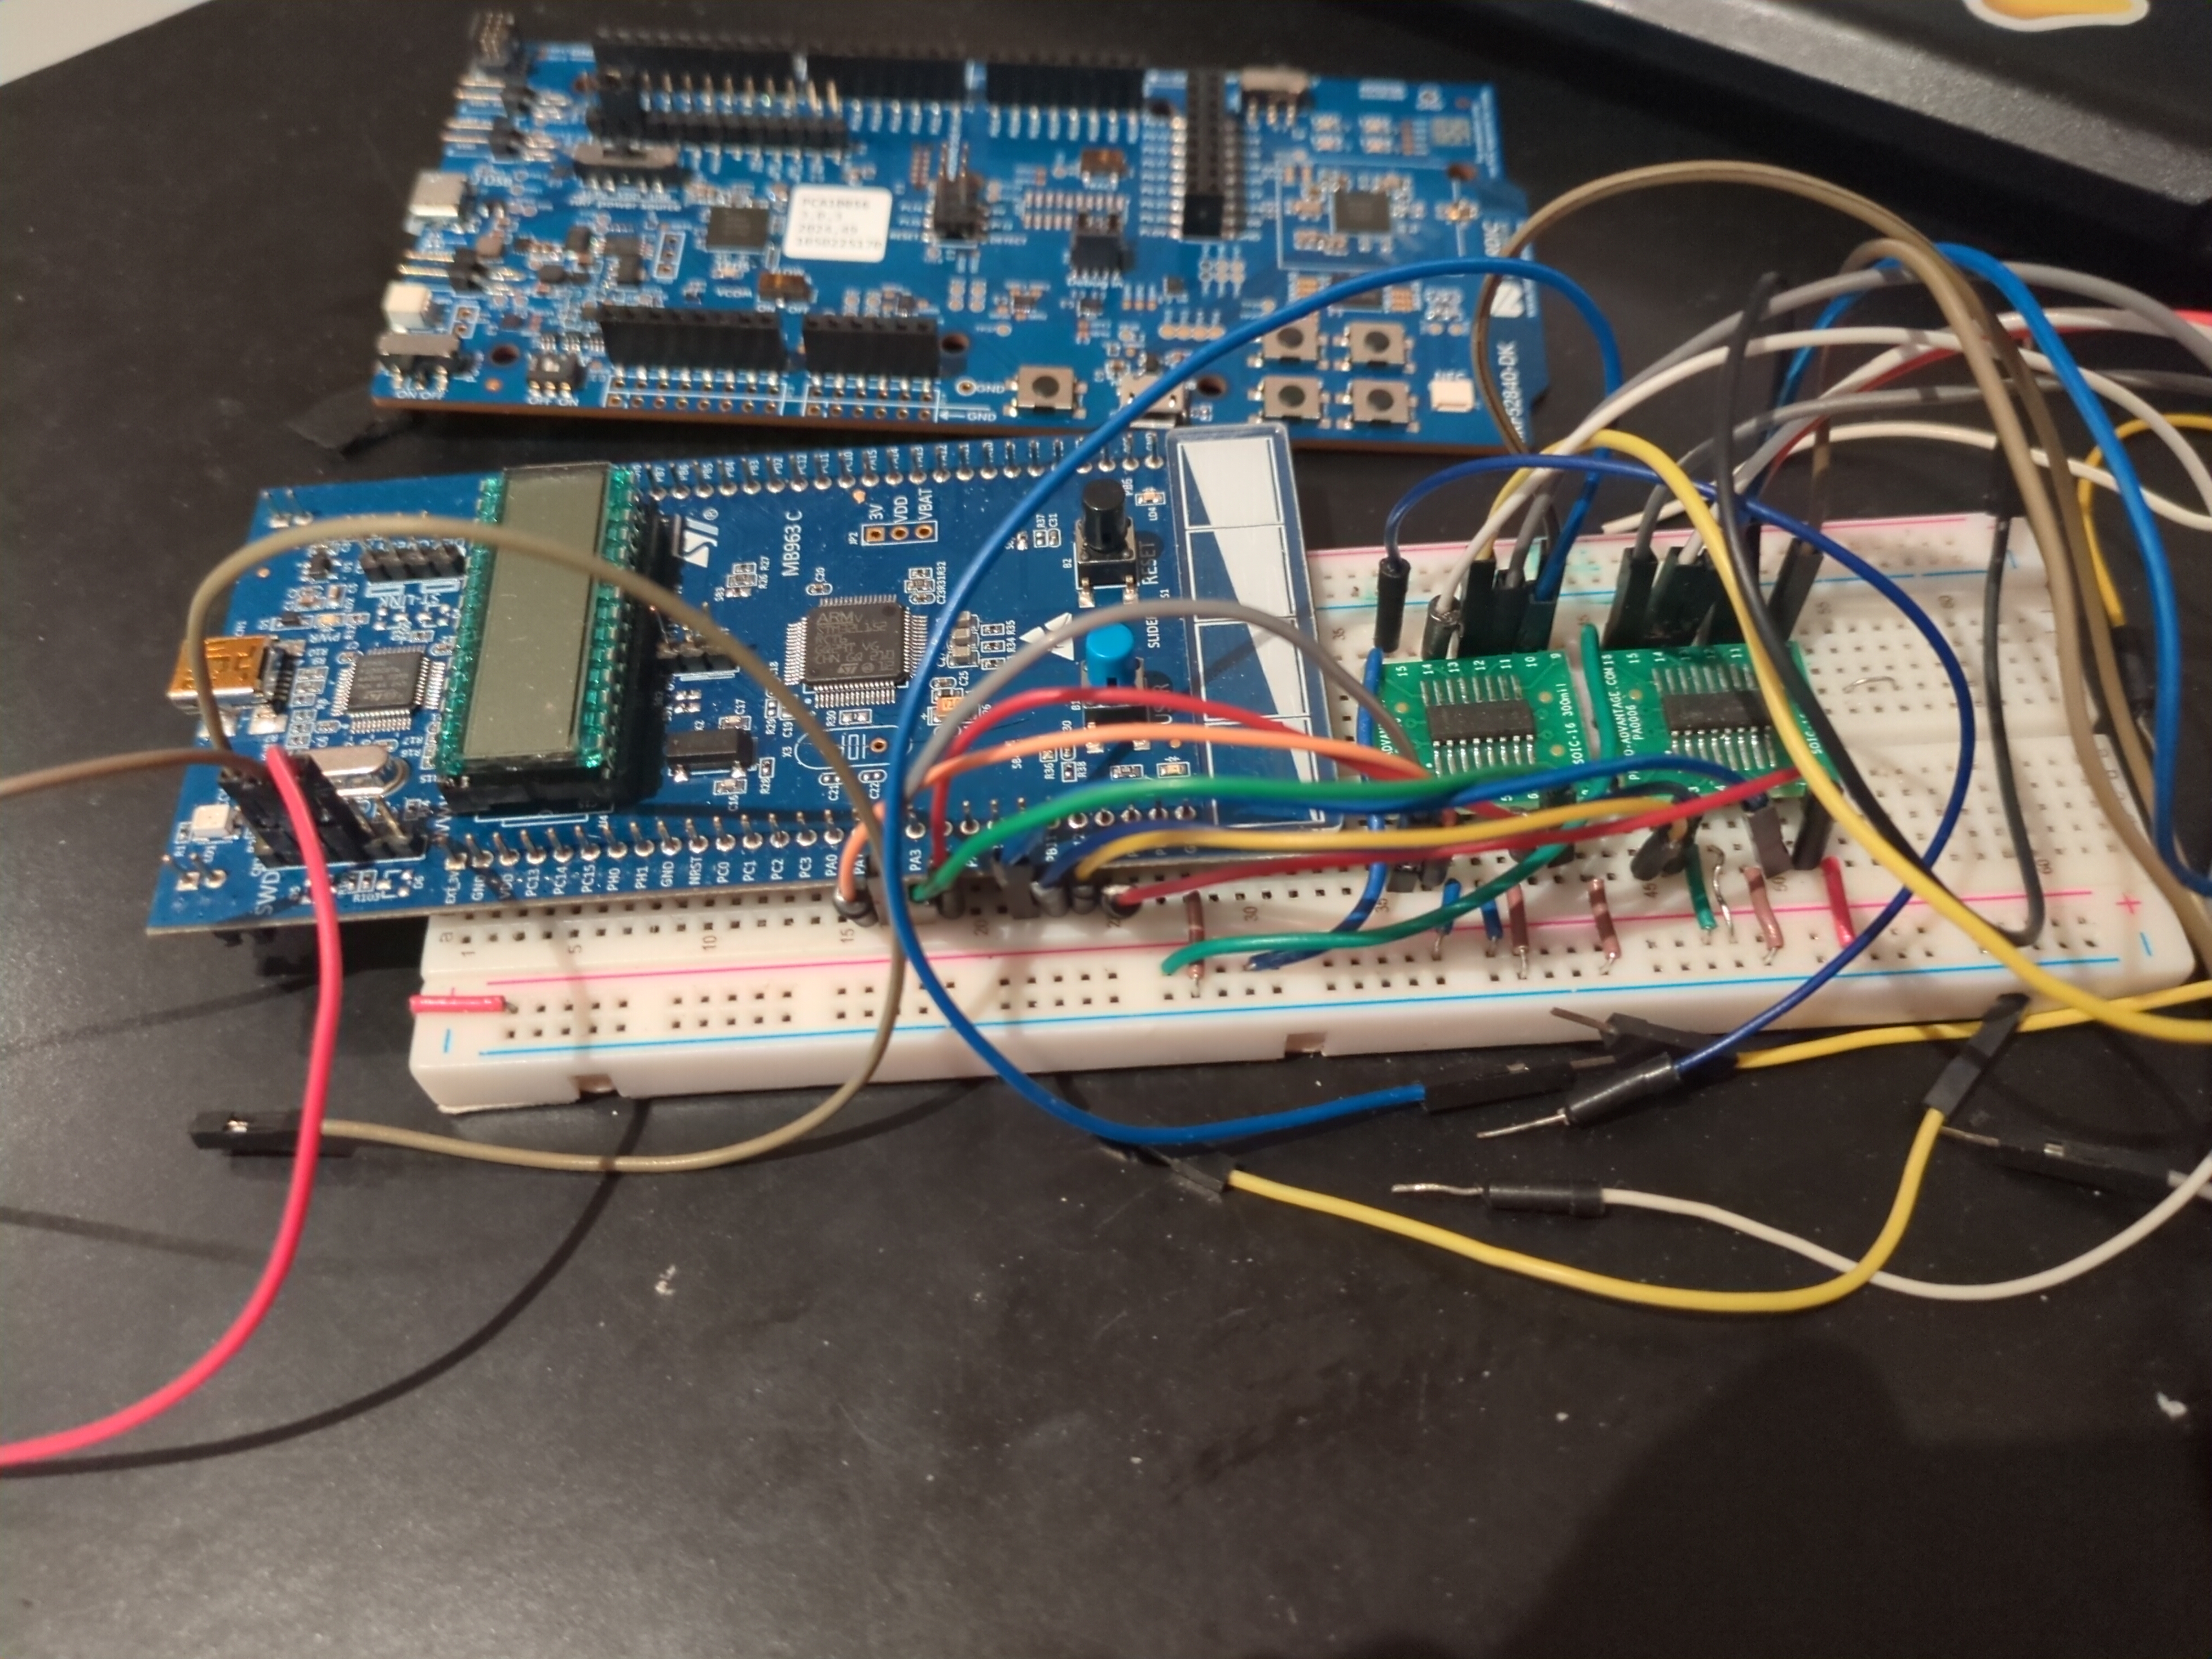
I bought a STM32L discovery from Mouser electronics for around 20 dollars. I also bought 2 MC14511B - BCD-to-Seven Segment Latch/Decoder/Driver. Make sure these have an output current of at least 20mA so you can drive the numitrons. Remember numitrons are incandescent bulbs, so they require a lot of current to drive. This will also make it slightly easier to see under direct sunlight. Numitrons won’t be super visible during bright days, so be warned. They look sick at night though. Prototyping was easy, I just wrote some code, which you can find on my Github that simply iterates each numitron channel from 0-9. Then I learned how to interact with the RTC. The biggest lesson I learned here is you need to read both the time and calendar register before the value actually updates. Reading the datasheet is important!!
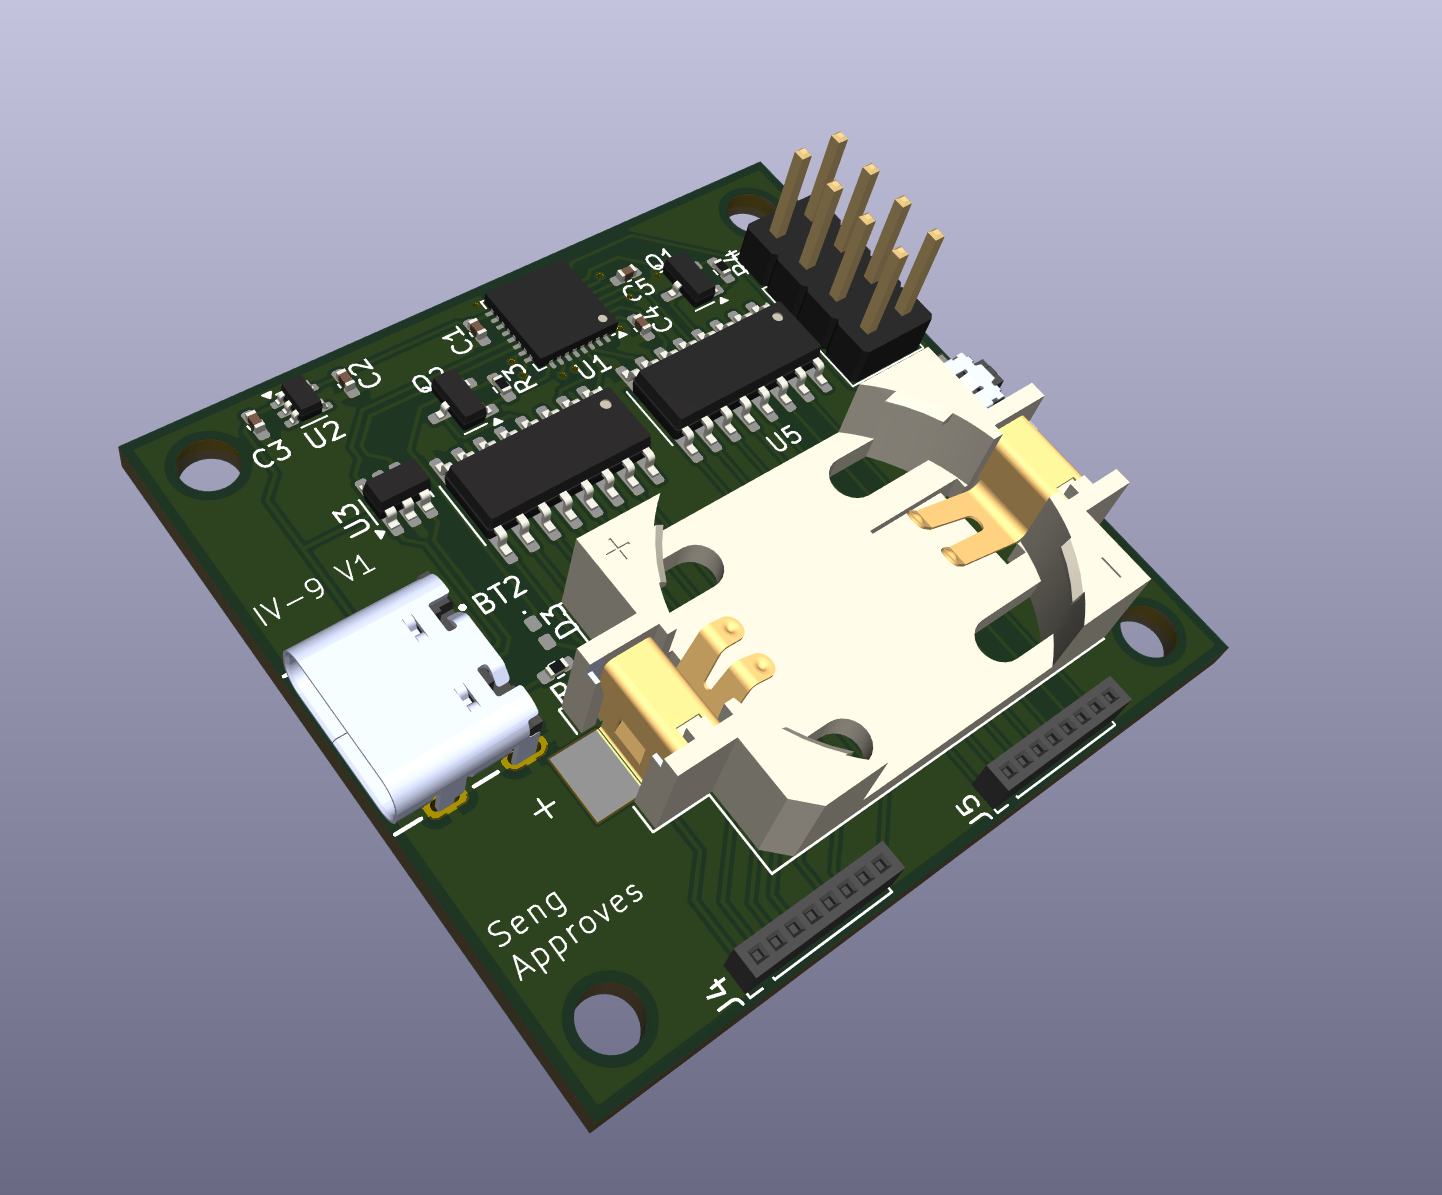
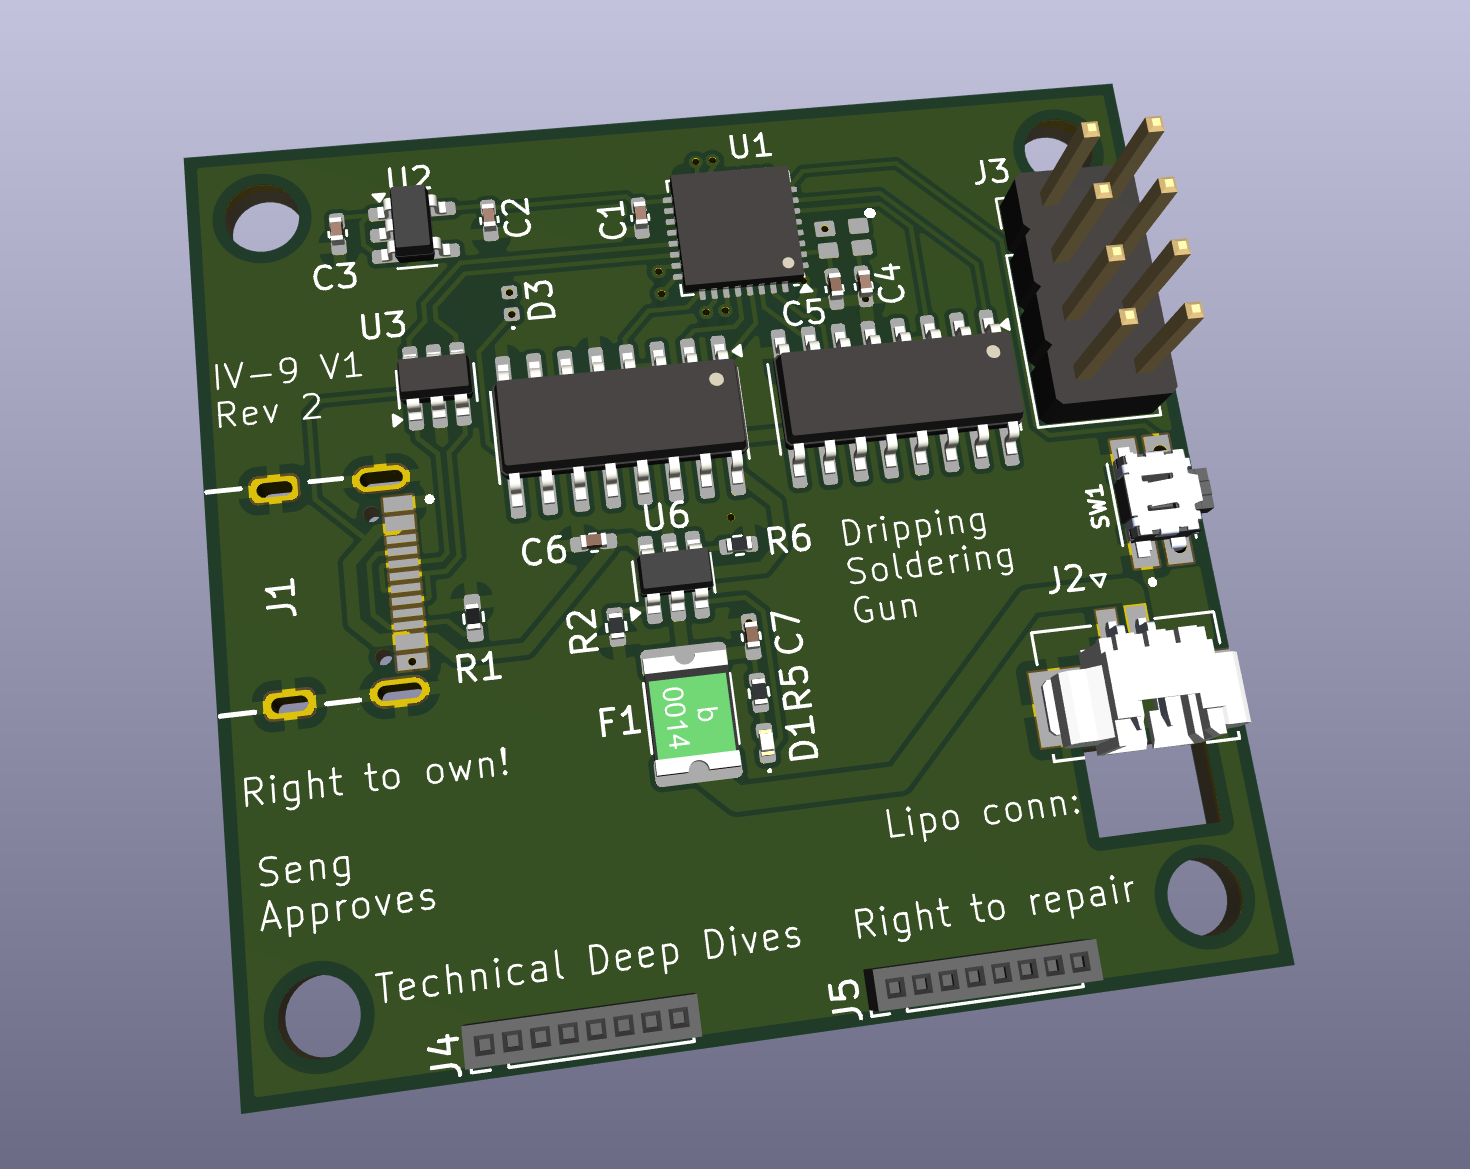
Next it was Kicad time. I designed a circuit for v1 of the pcb:
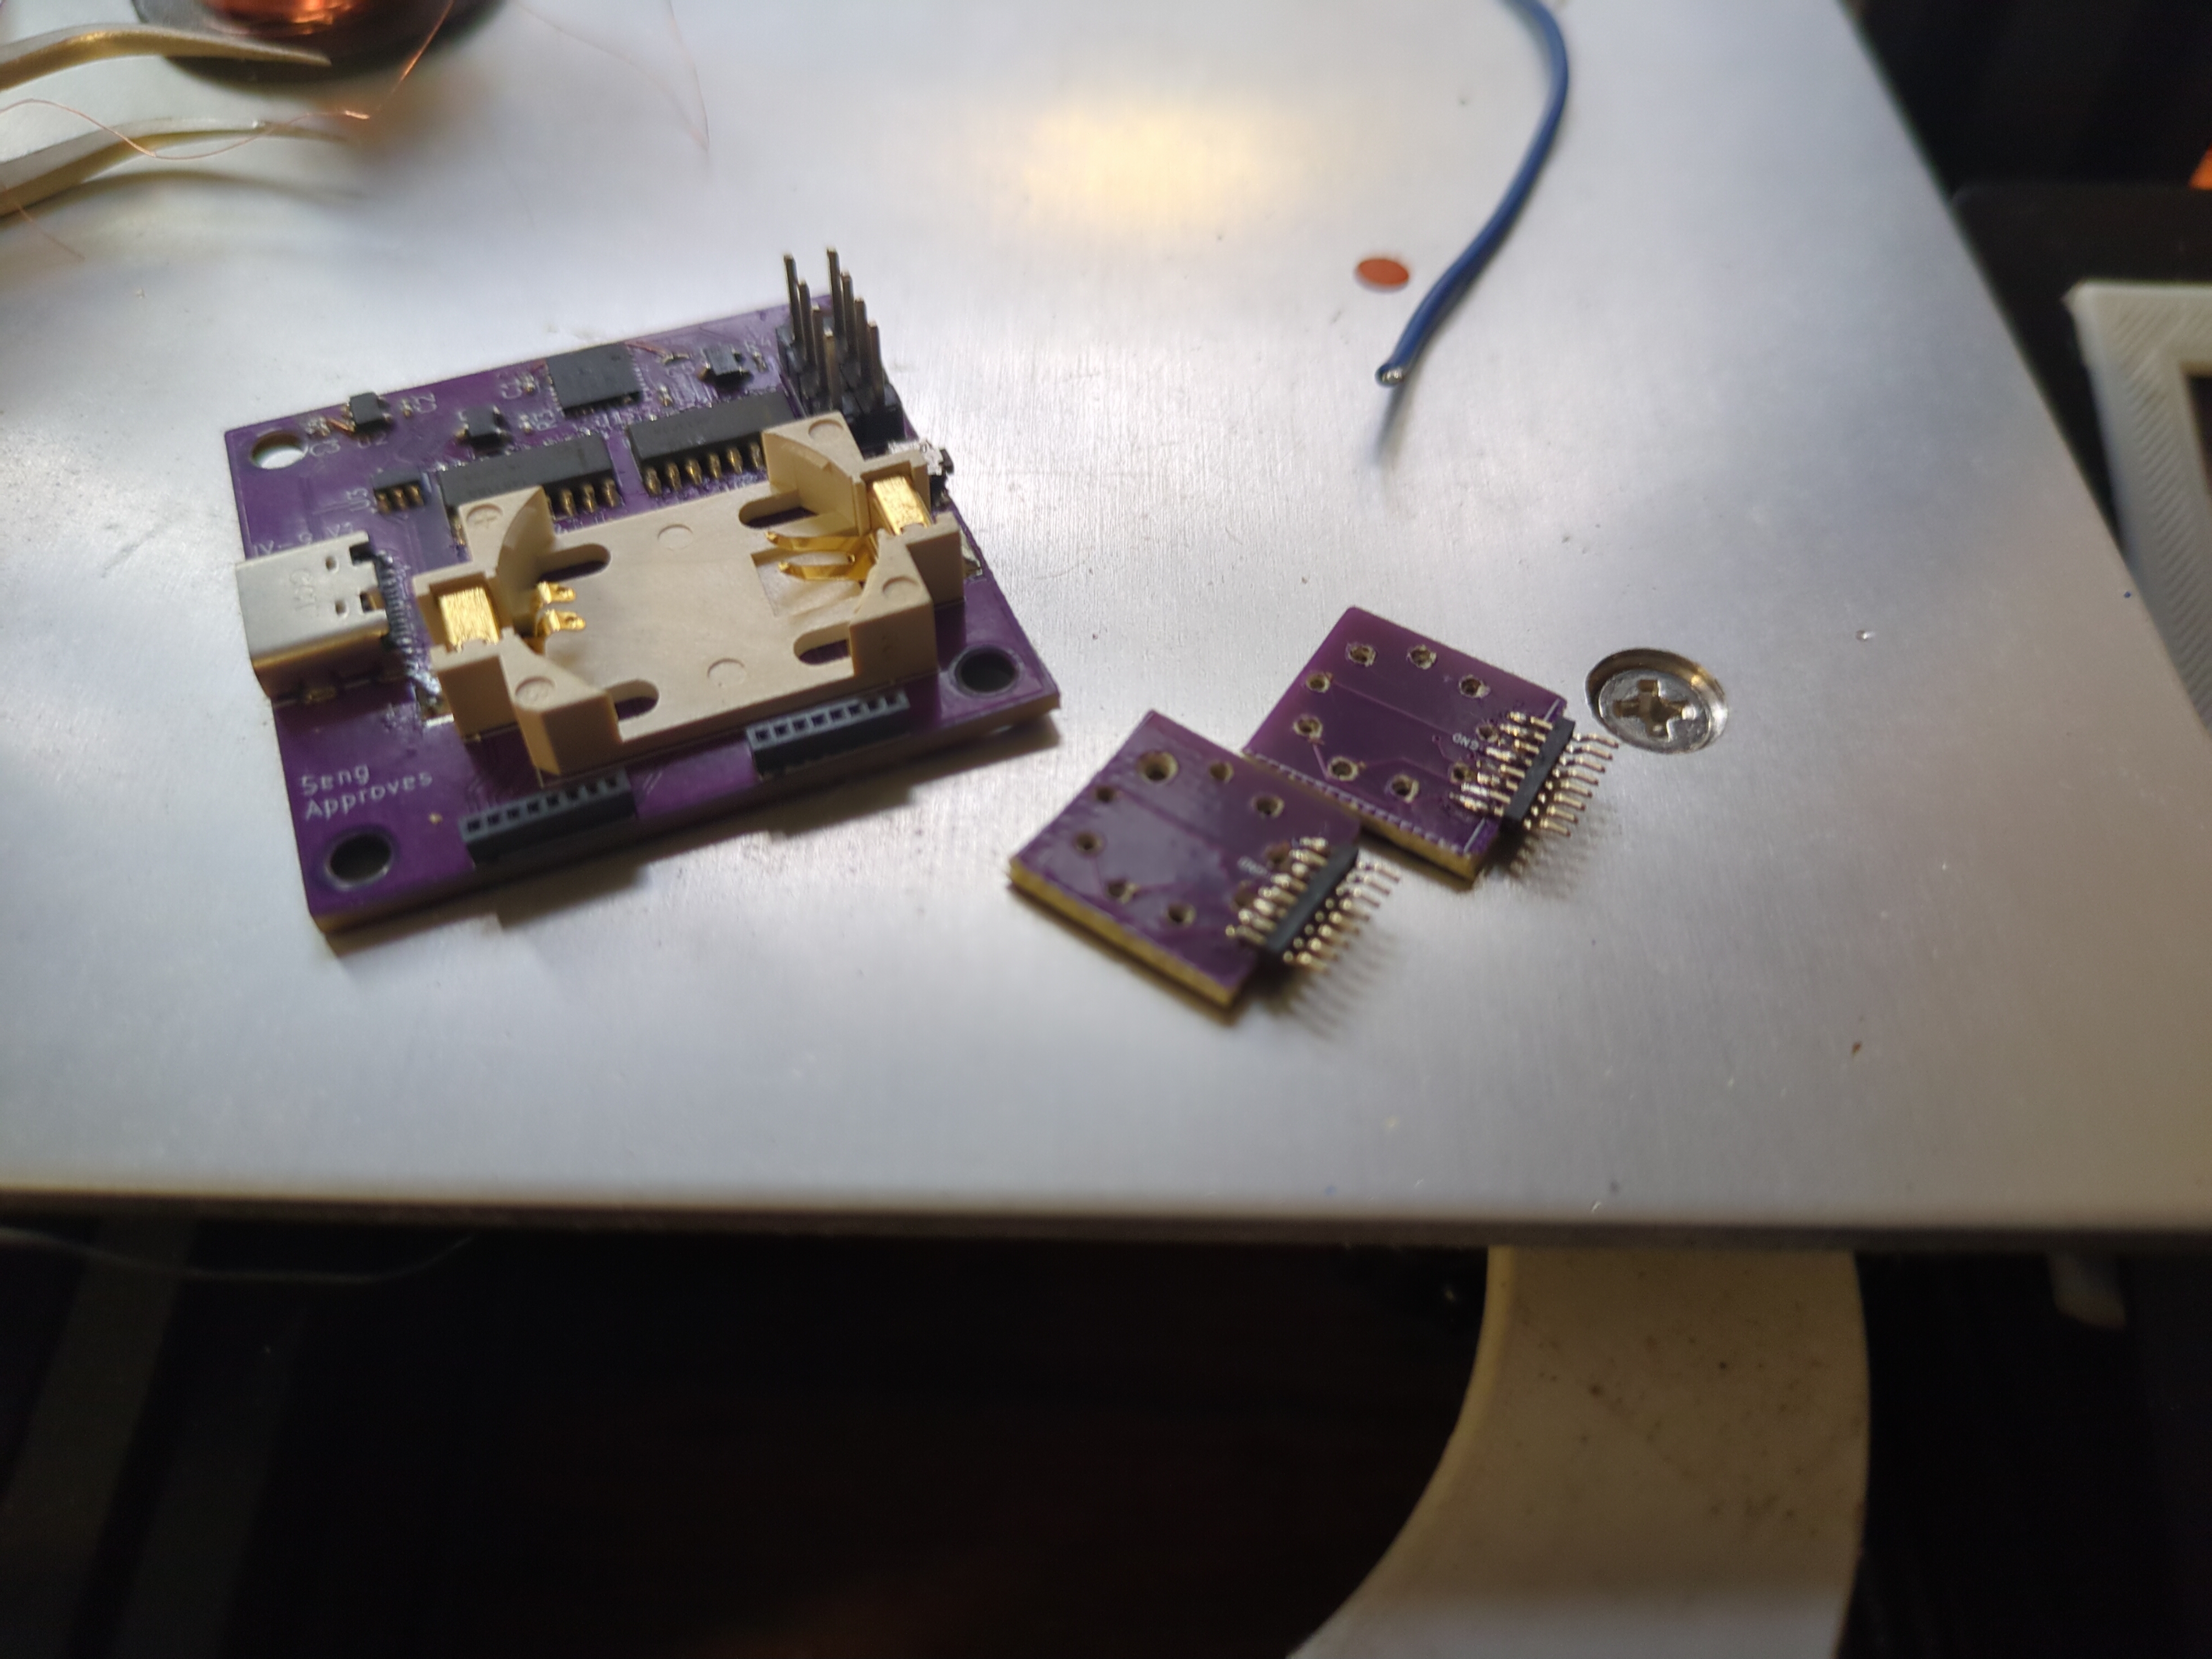
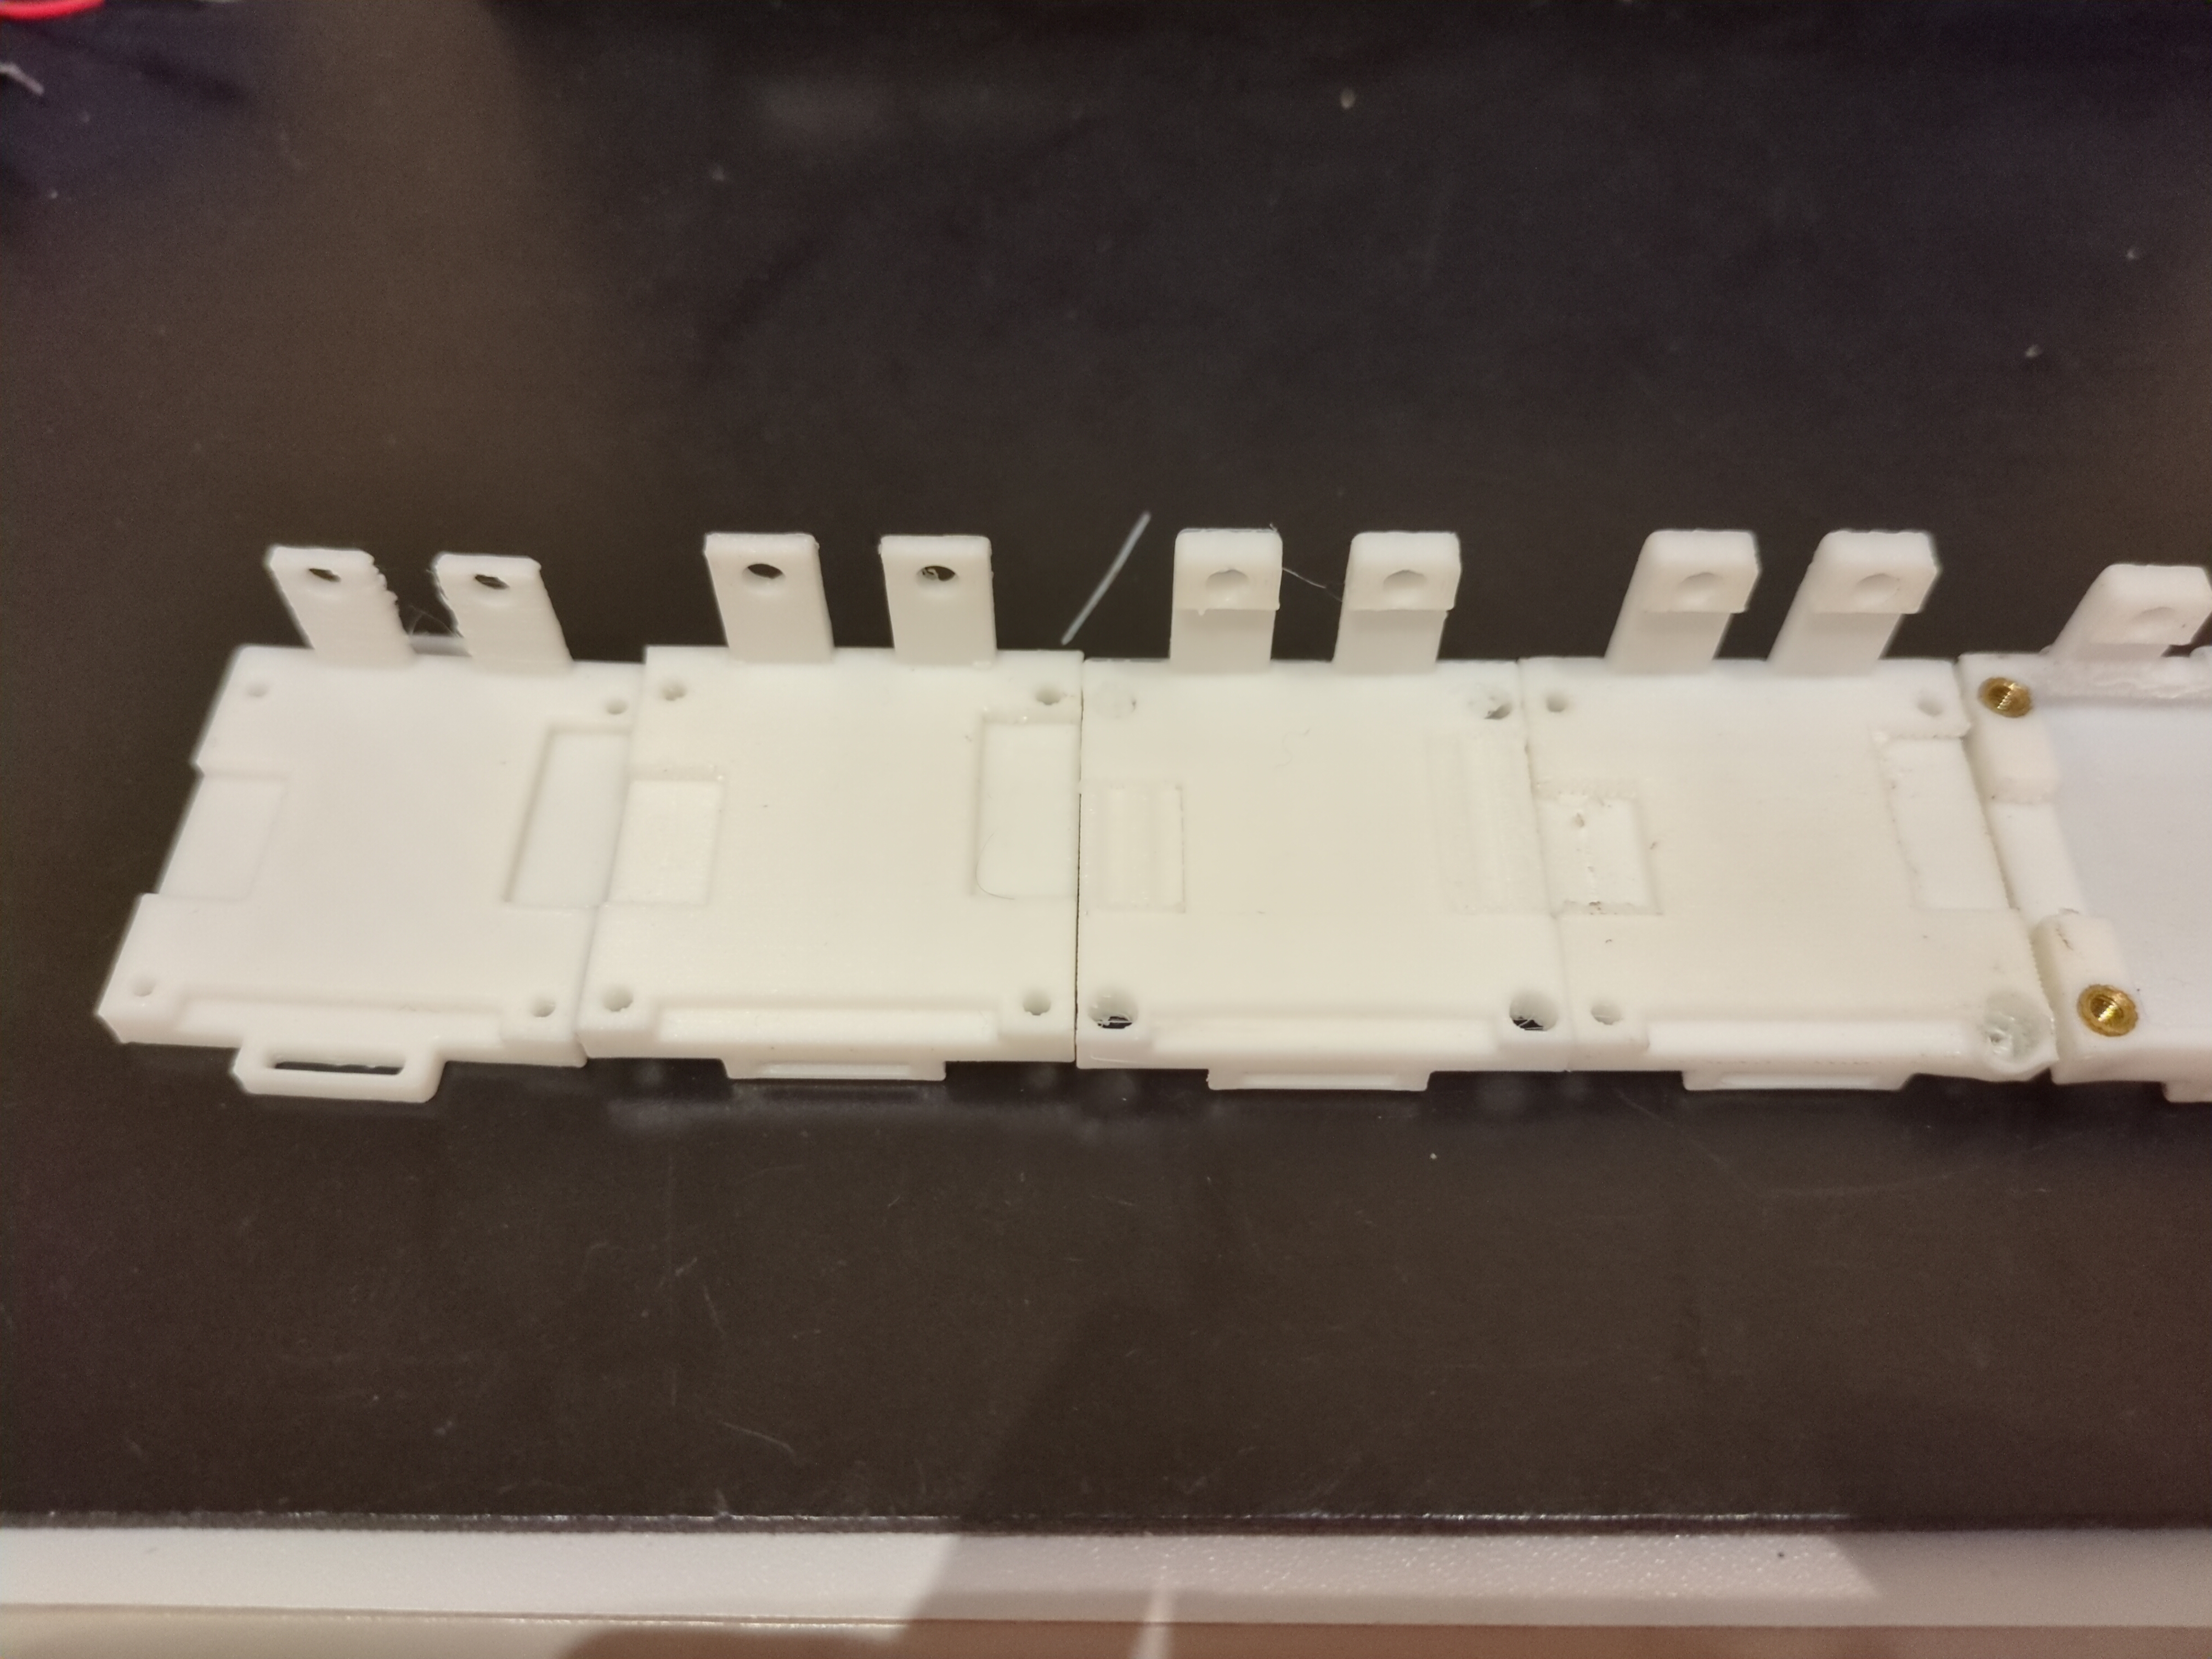
I wanted to use a CR2032 to keep the board as thin as possible. I also wanted a socketed design of the numitron tubes so they can be easily replaced if needed. I learned later that this wasn’t super practical or secure. The brightness was also too low to be visible even on a cloudy day outdoors. Anyways, I ordered the PCB through JLCPCB and 2 weeks later I received them. I immediately got to work soldering the boards and daughter boards:
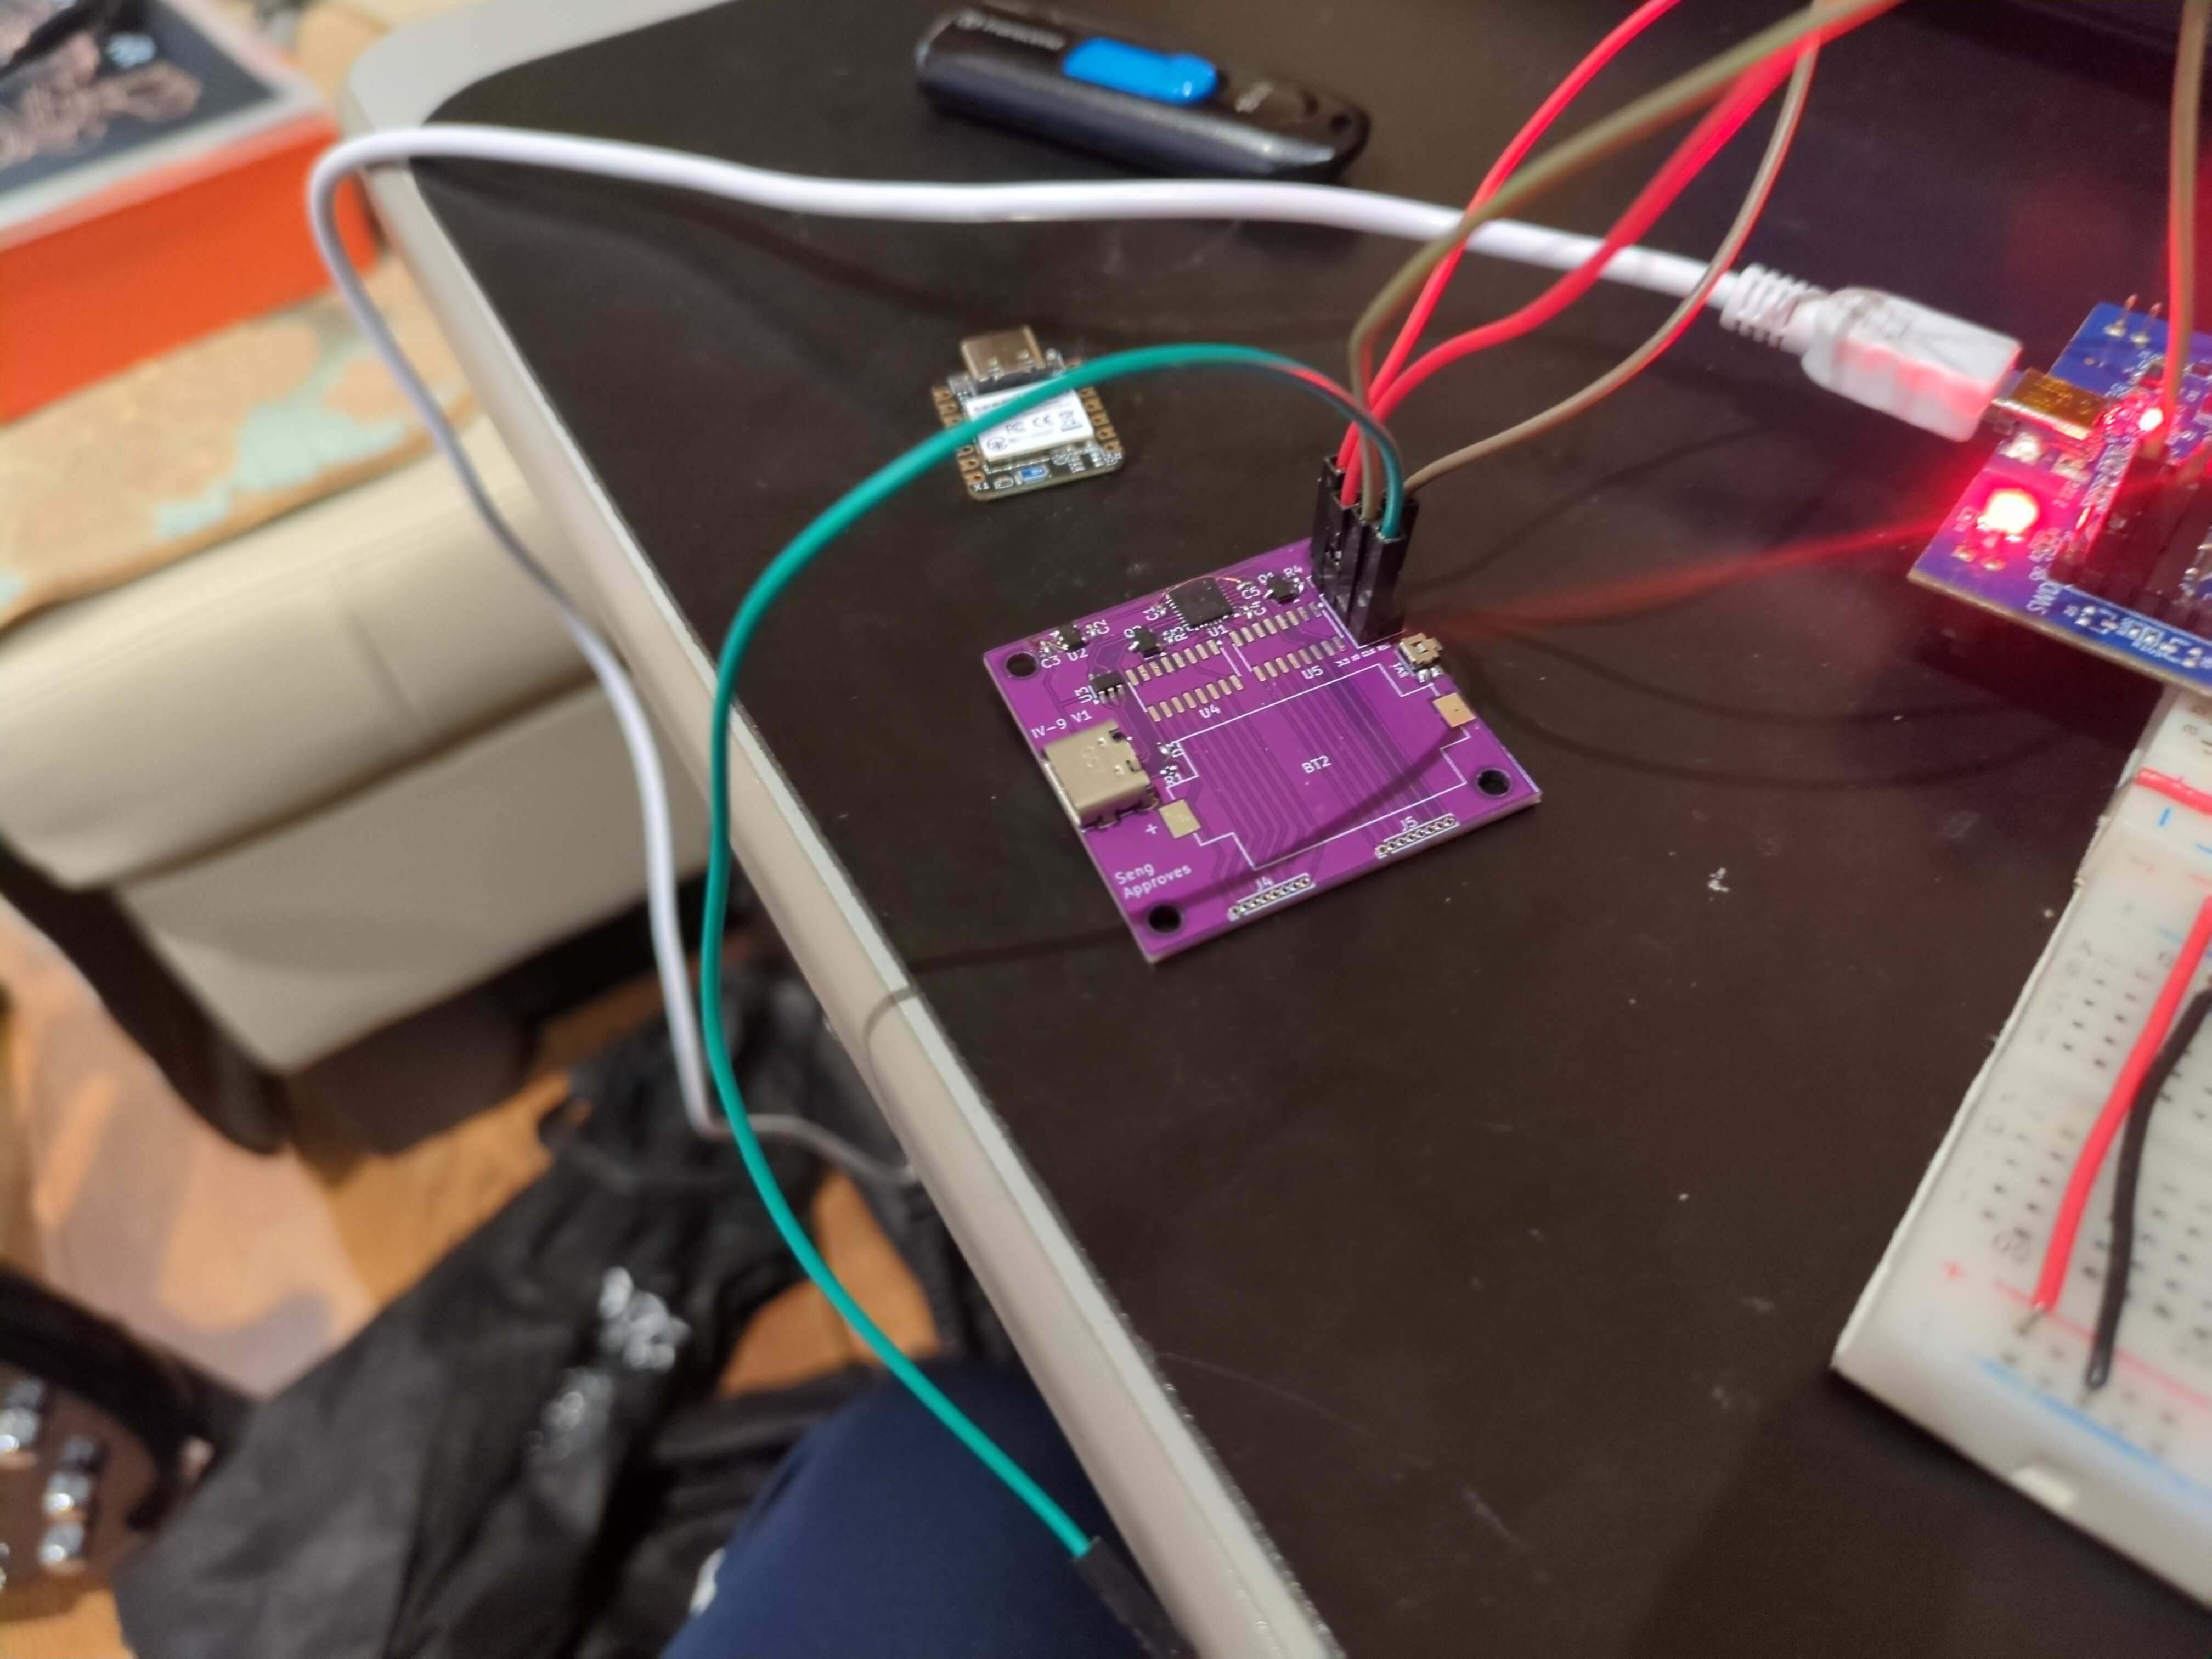
After a bunch of fiddling around with SWD. I was mainly having trouble with the uc not resetting after it went into shutdown mode. I realized I needed to bring the BOOT0 pin to ground to “reset” the uc. This tells the uc to start in bootloader mode and not run the actual code, which would instantly put the uc to sleep. I soldered a super thin magnet wire to pin 31 of the STM32L432K to a jumper wire. Shorting that to ground during programming and I was finally able to reset the uc. TLDR, make sure to have BOTH RST and BOOT0 pins exposed on the programming connector. I only had RST exposed, which isn’t enough.
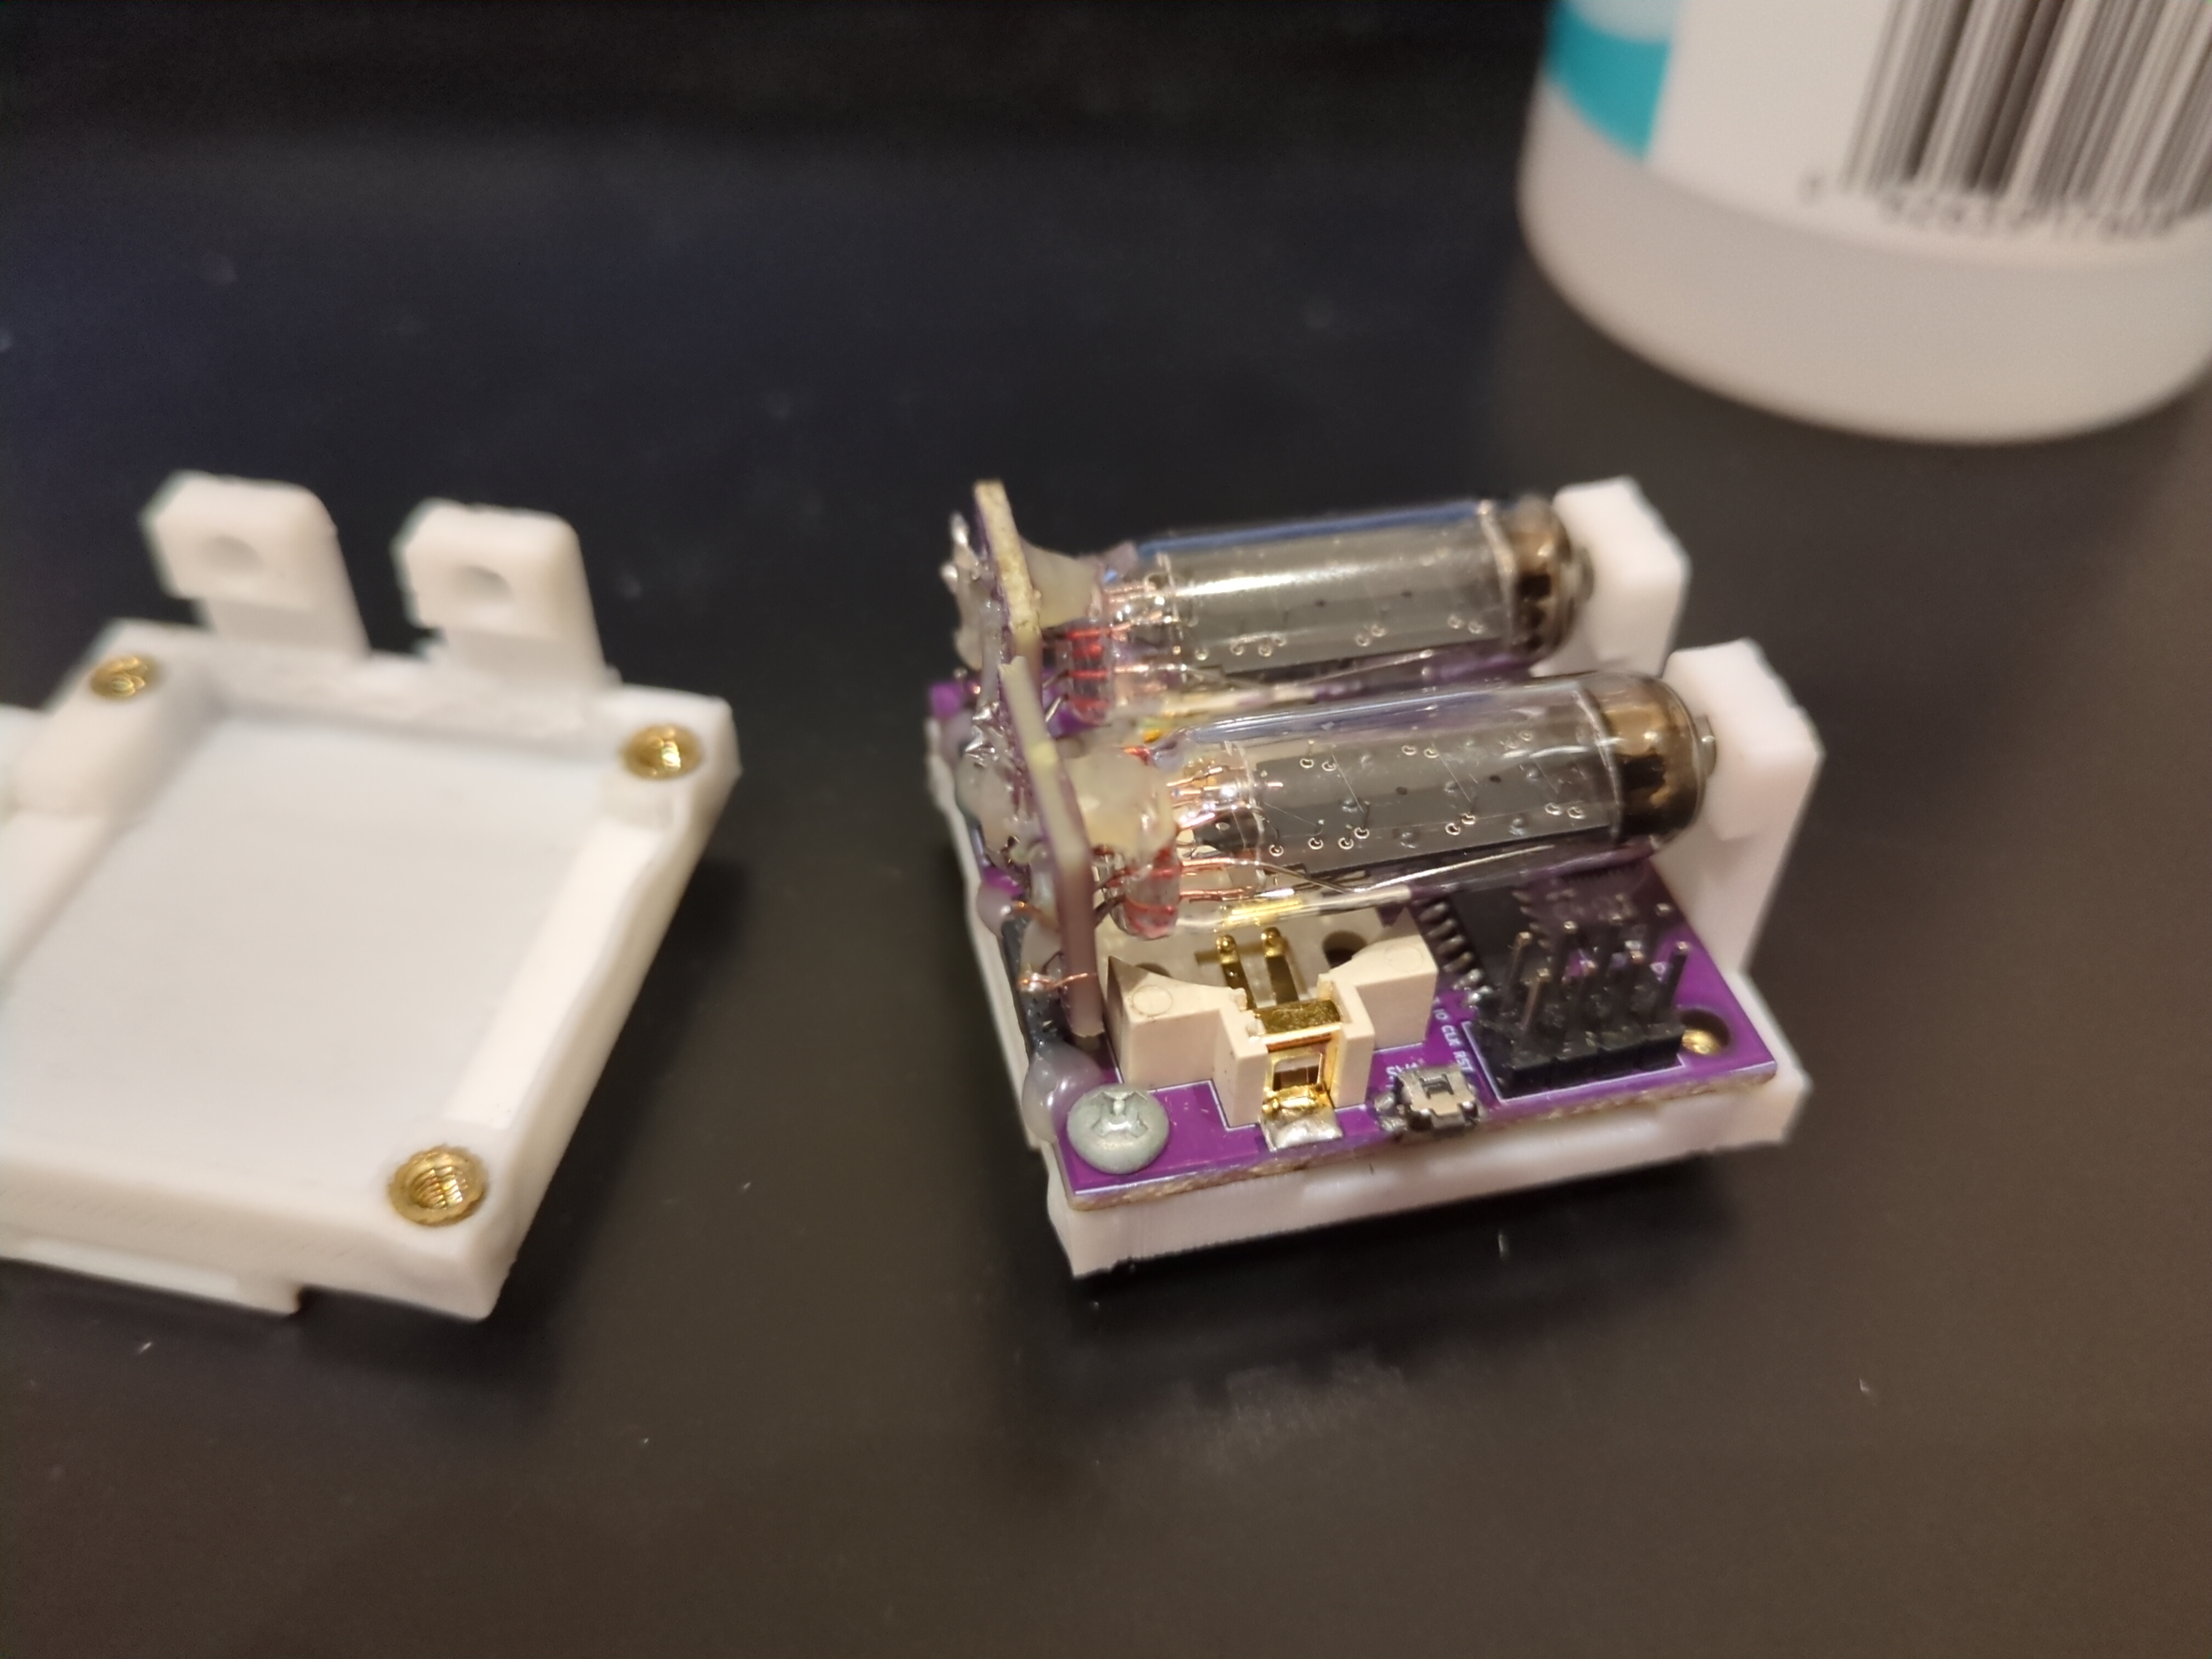
Finally, I soldered the rest of the components and put on the socketed numitron tubes. This is the final product of v1:
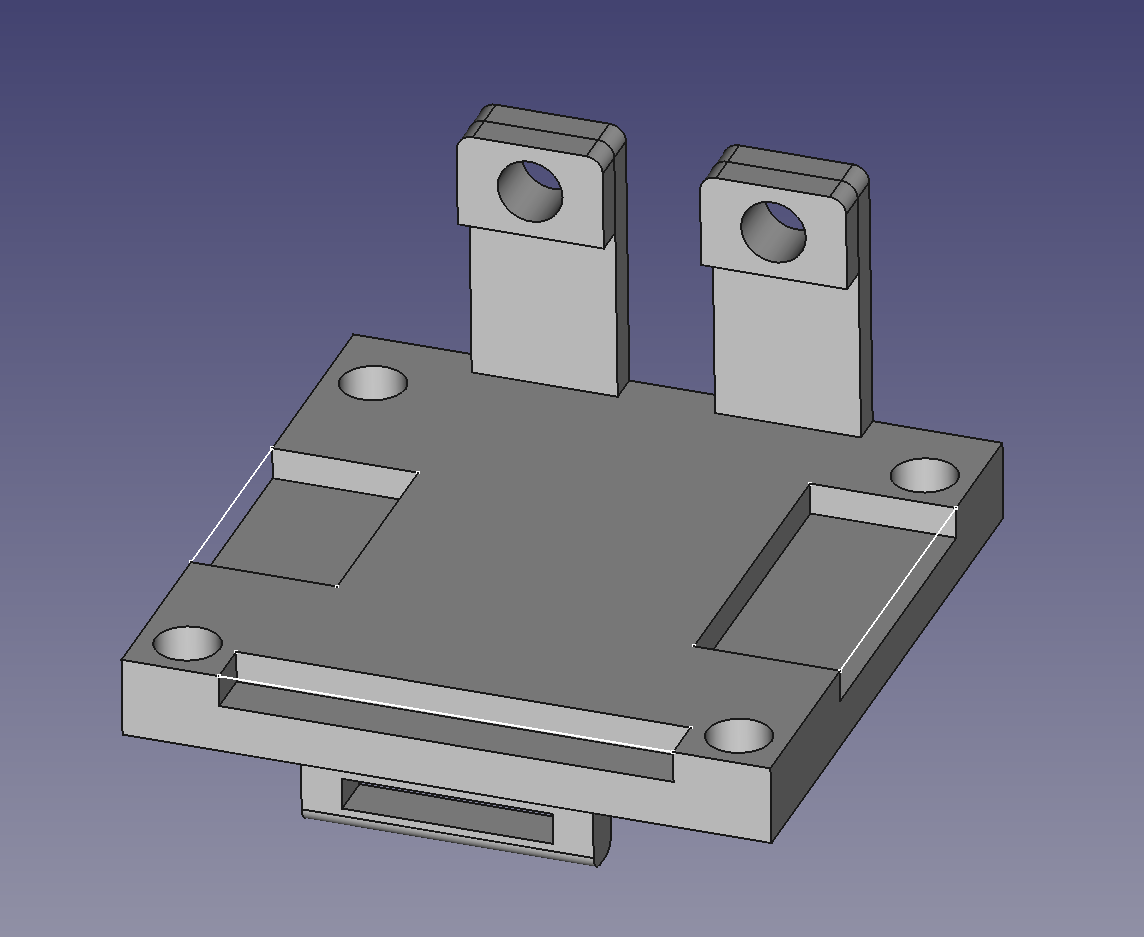
Now its time for case design. Fired up FreeCad and imported the PCB design from KiCad. This will allow me to precisely create the enclosure and ensure the board fits on perfectly. I made the enclosure 5mm thick with supports for the Numitron tubes. This took me quite a few tries to match the height perfectly because measuring the tube offset from the PCB wasn’t easy. This is the v1 enclosure design:
I made 4 version of the v1 design before everything fit nice. Now its time to put 4 threaded inserts into the PLA. Whoops:
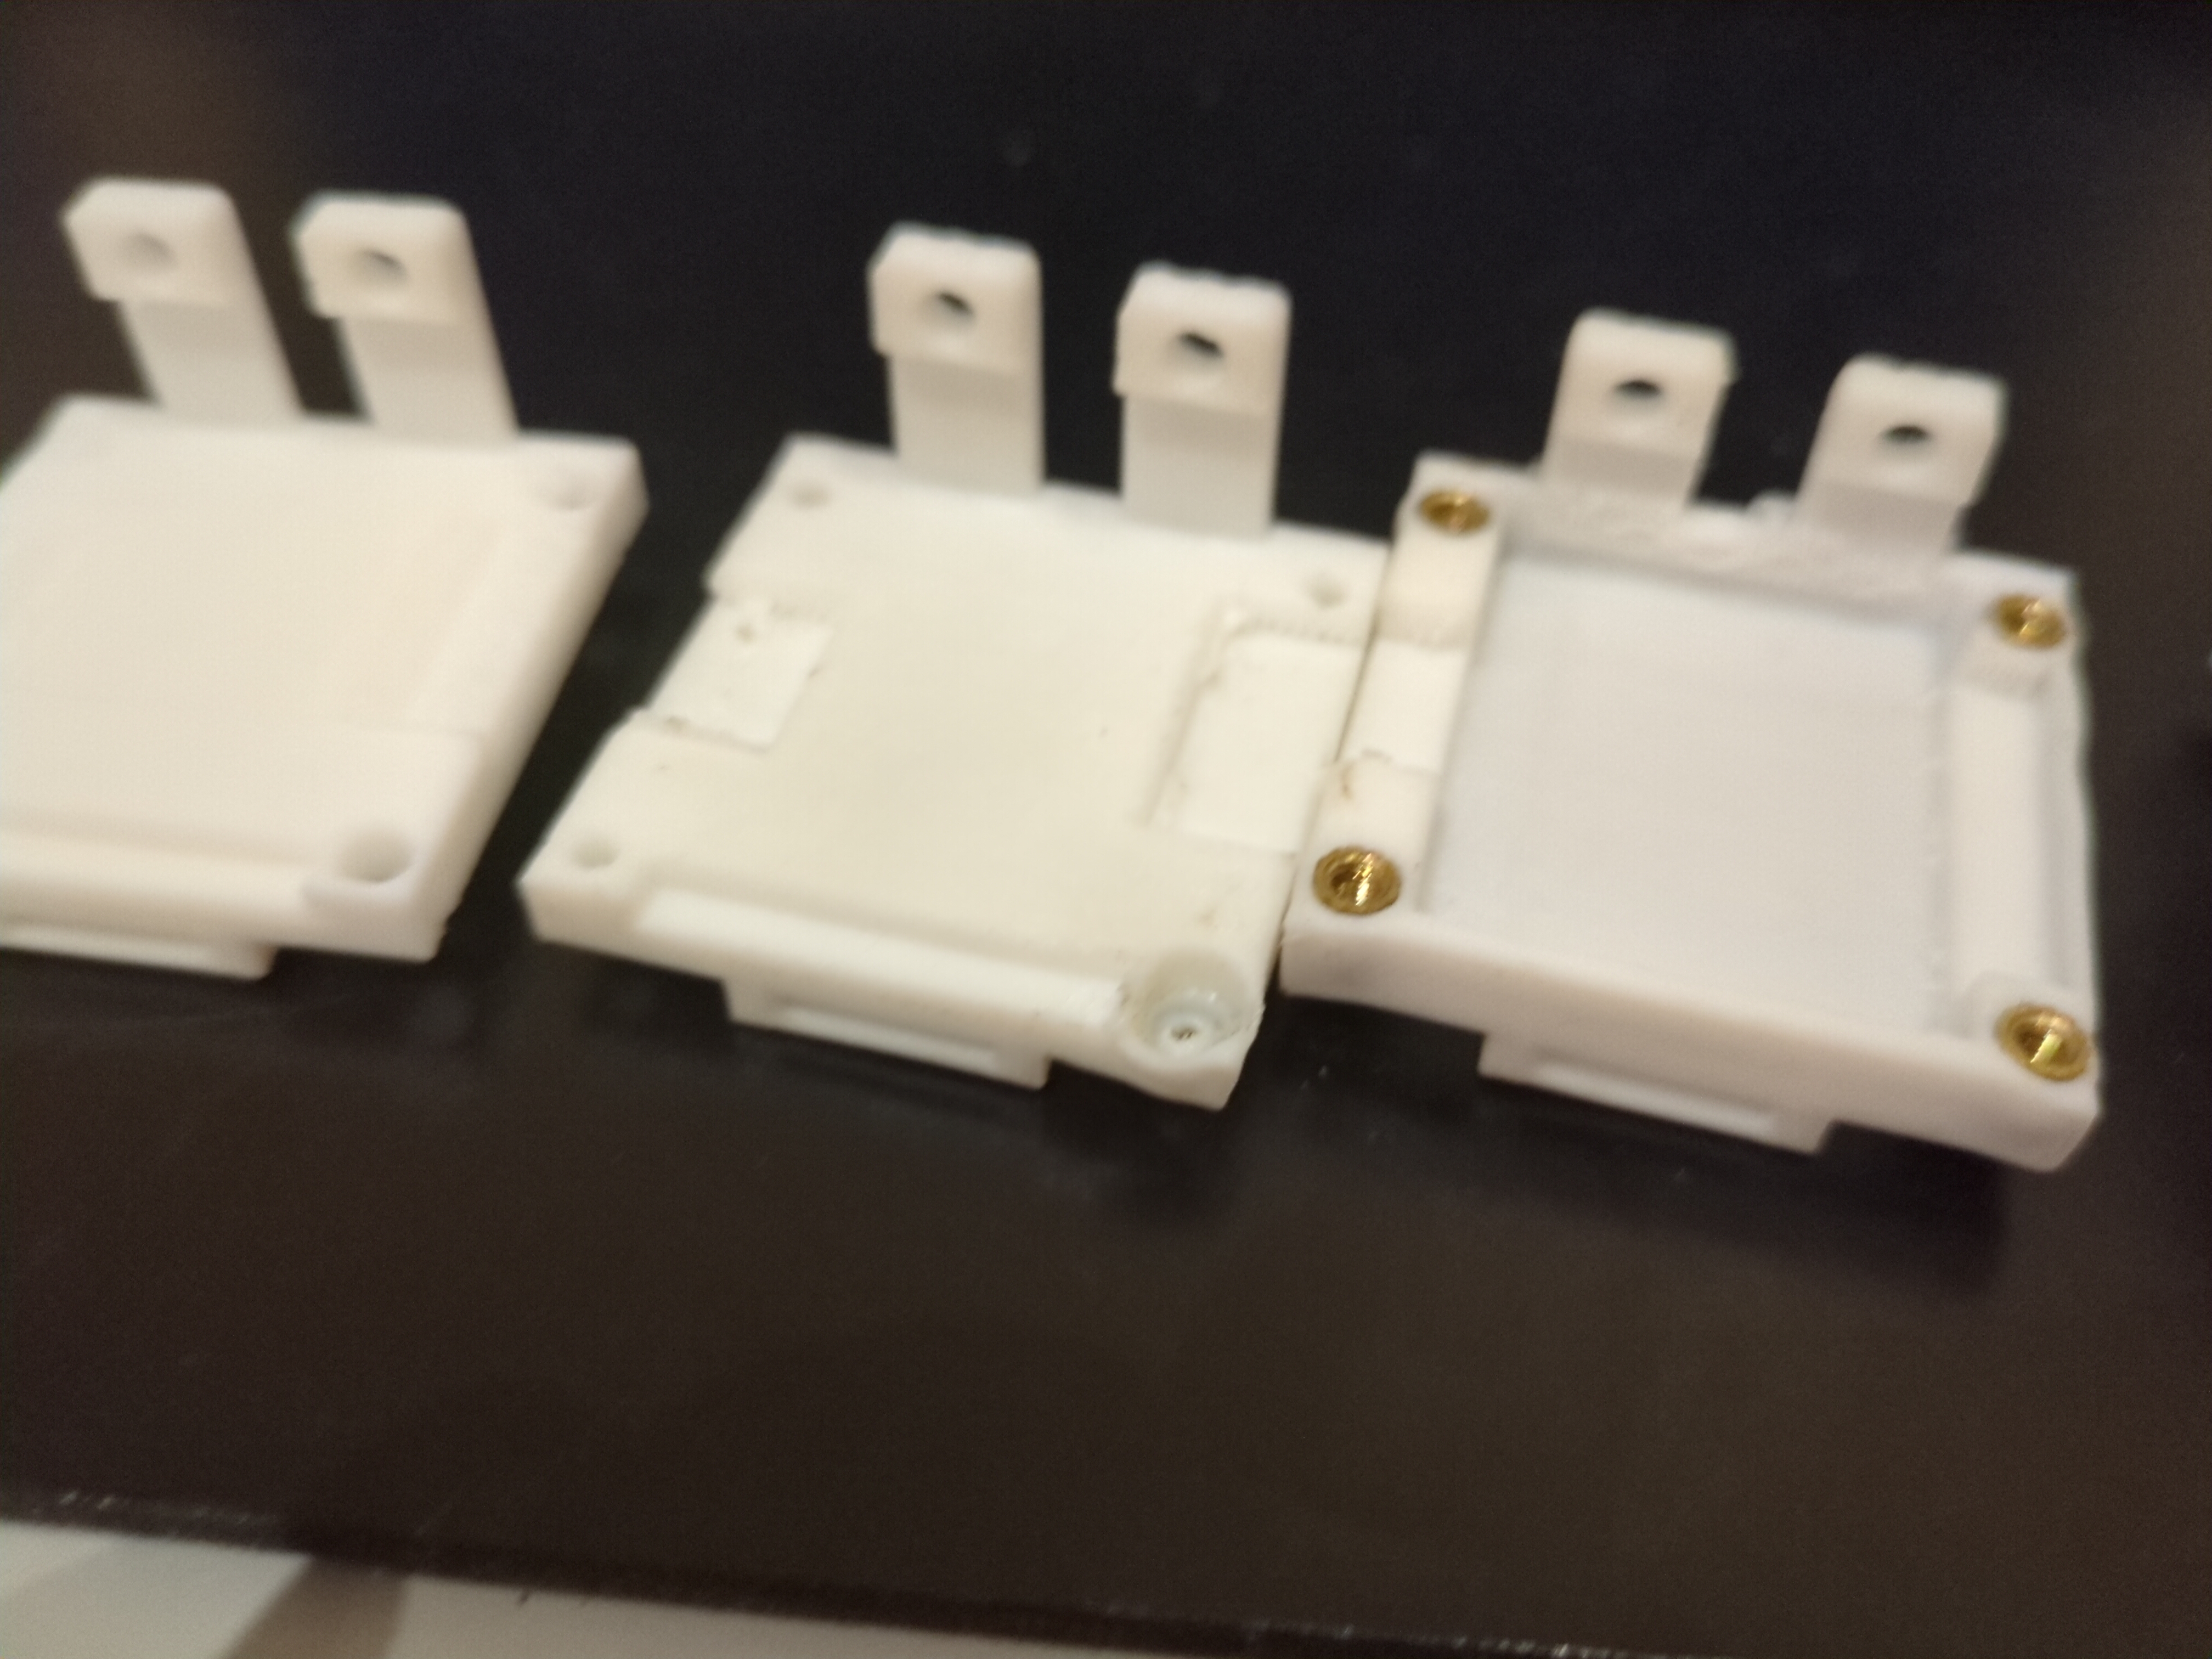
On the left you can see my failure. Even though these are M3 threaded inserts, the OD is actually around 4.5mm. I made the holes only 3mm and of course it won’t fit. My next revision, the holes are now 4mm, which allows the threaded inserts to insert perfectly as seen on the right. Finally after all this work, I mounted the PCB and programmed the final v1 firmware:
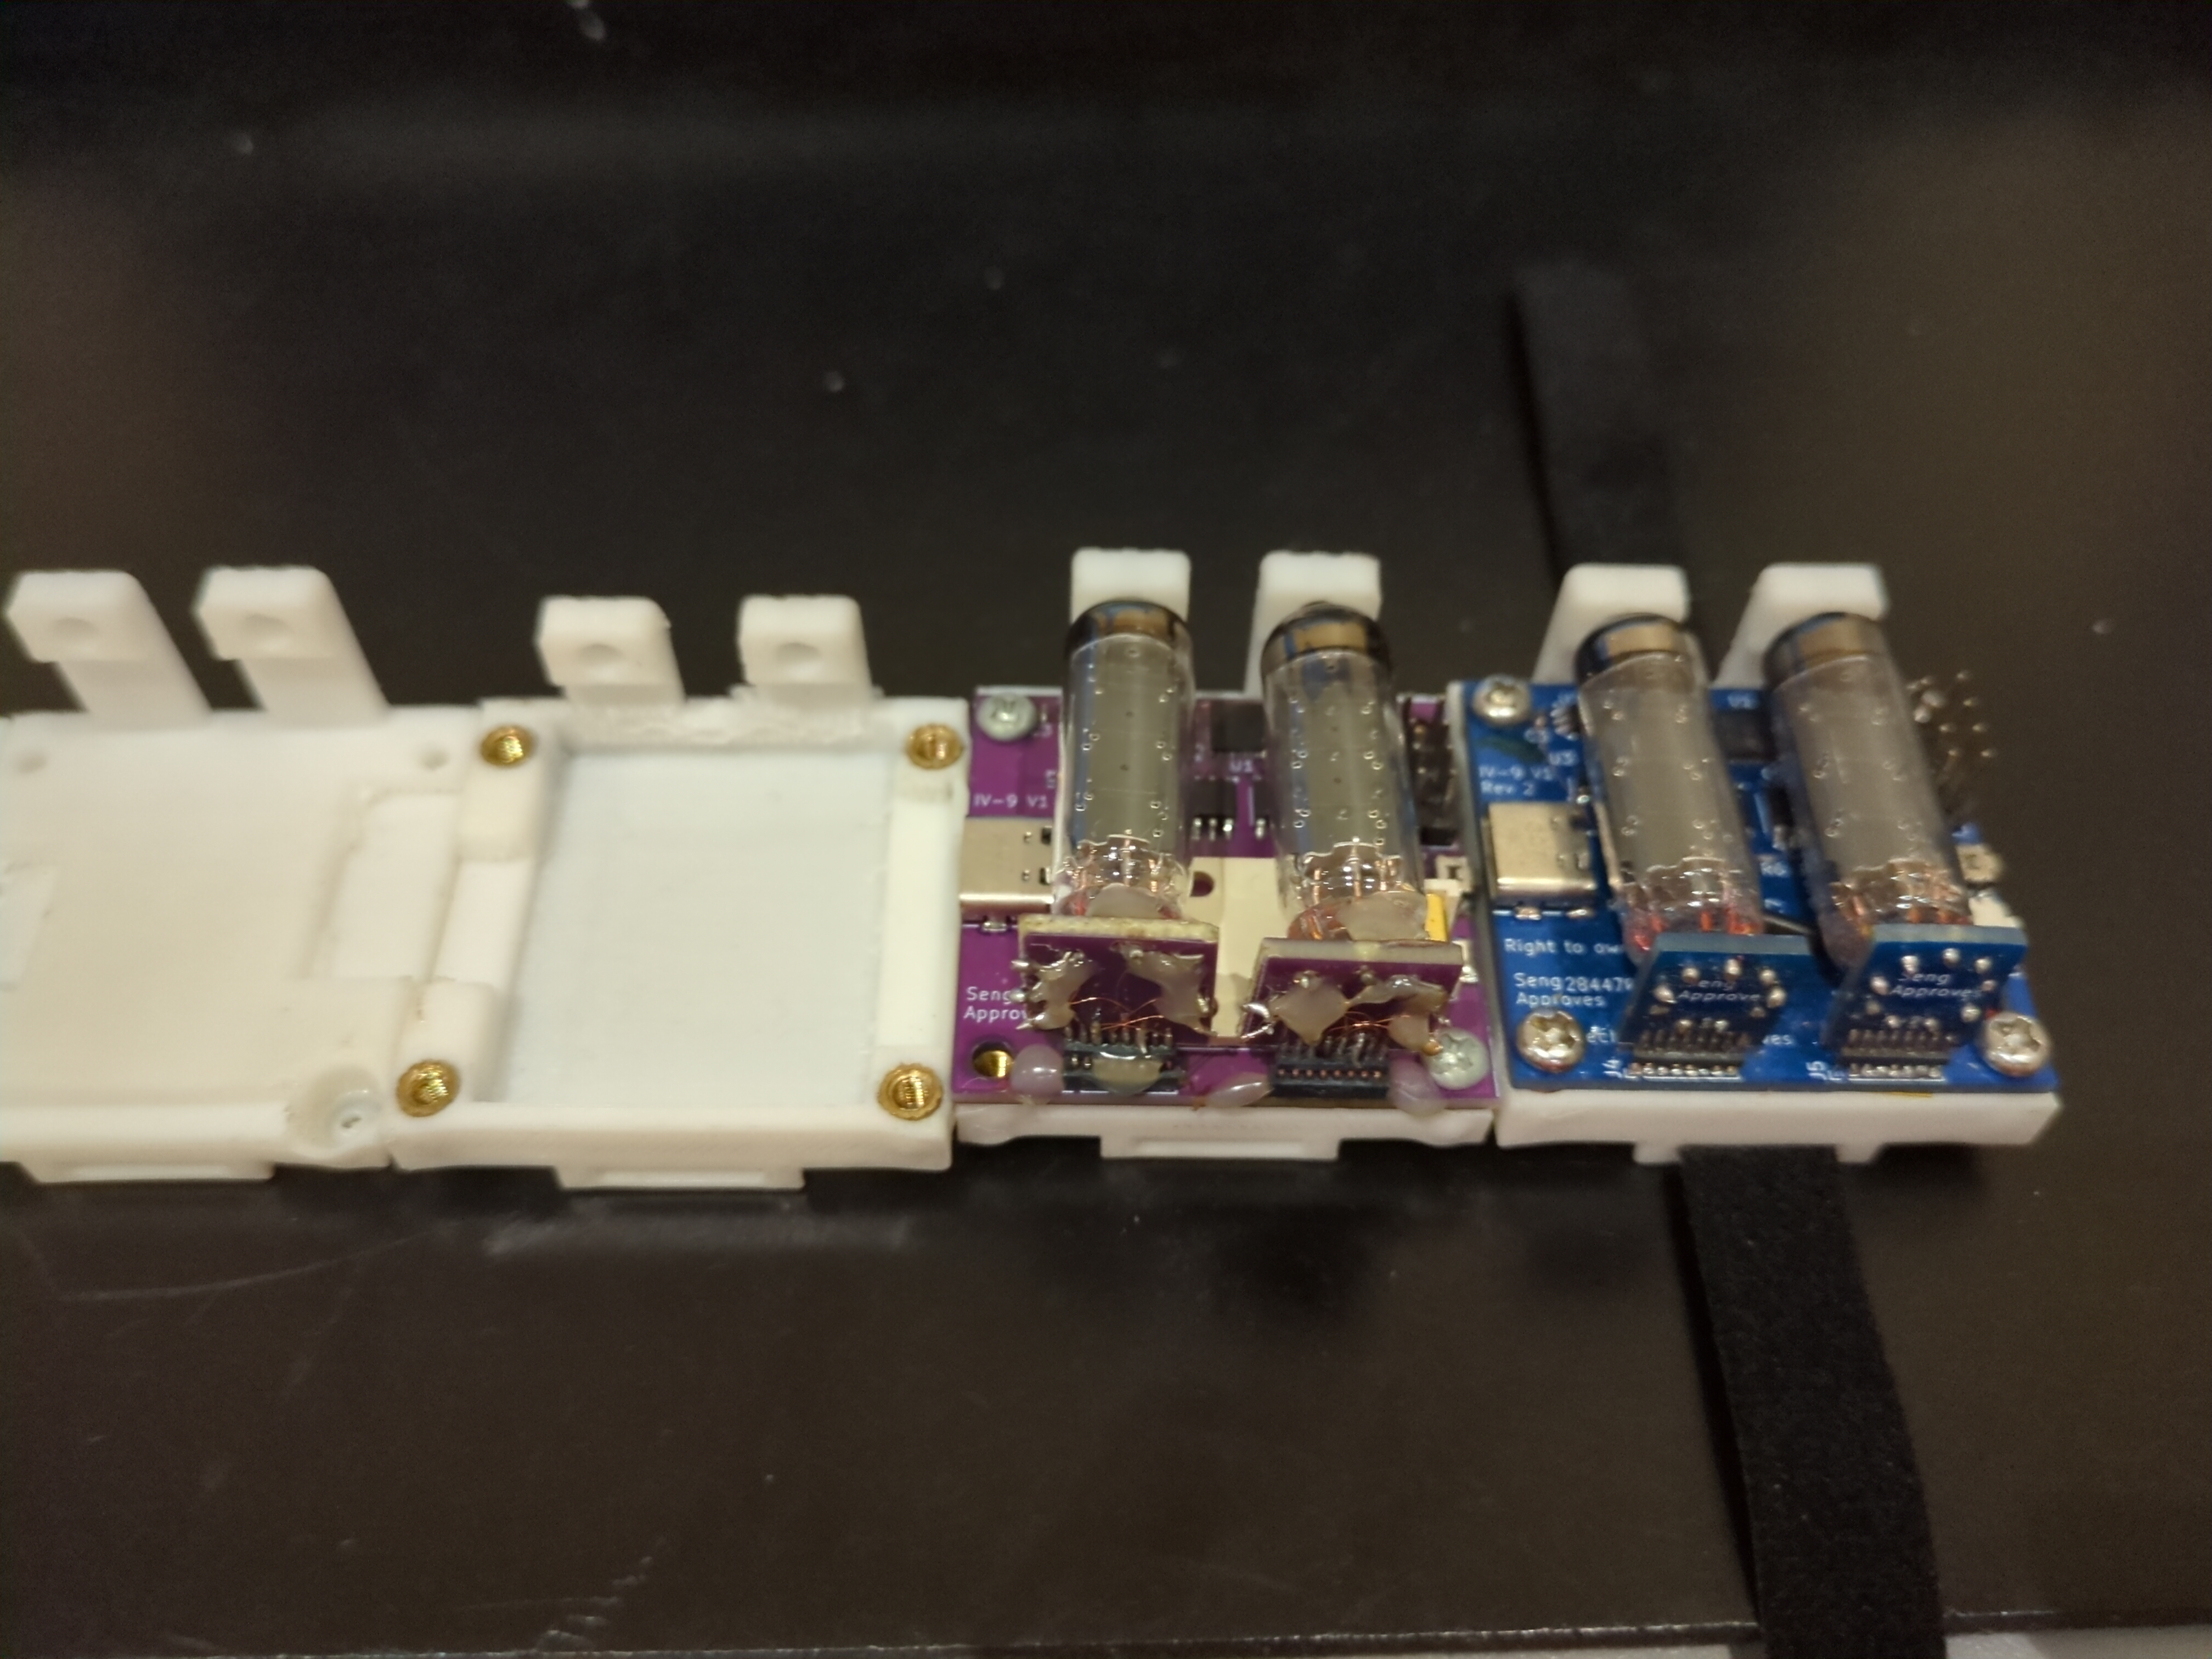
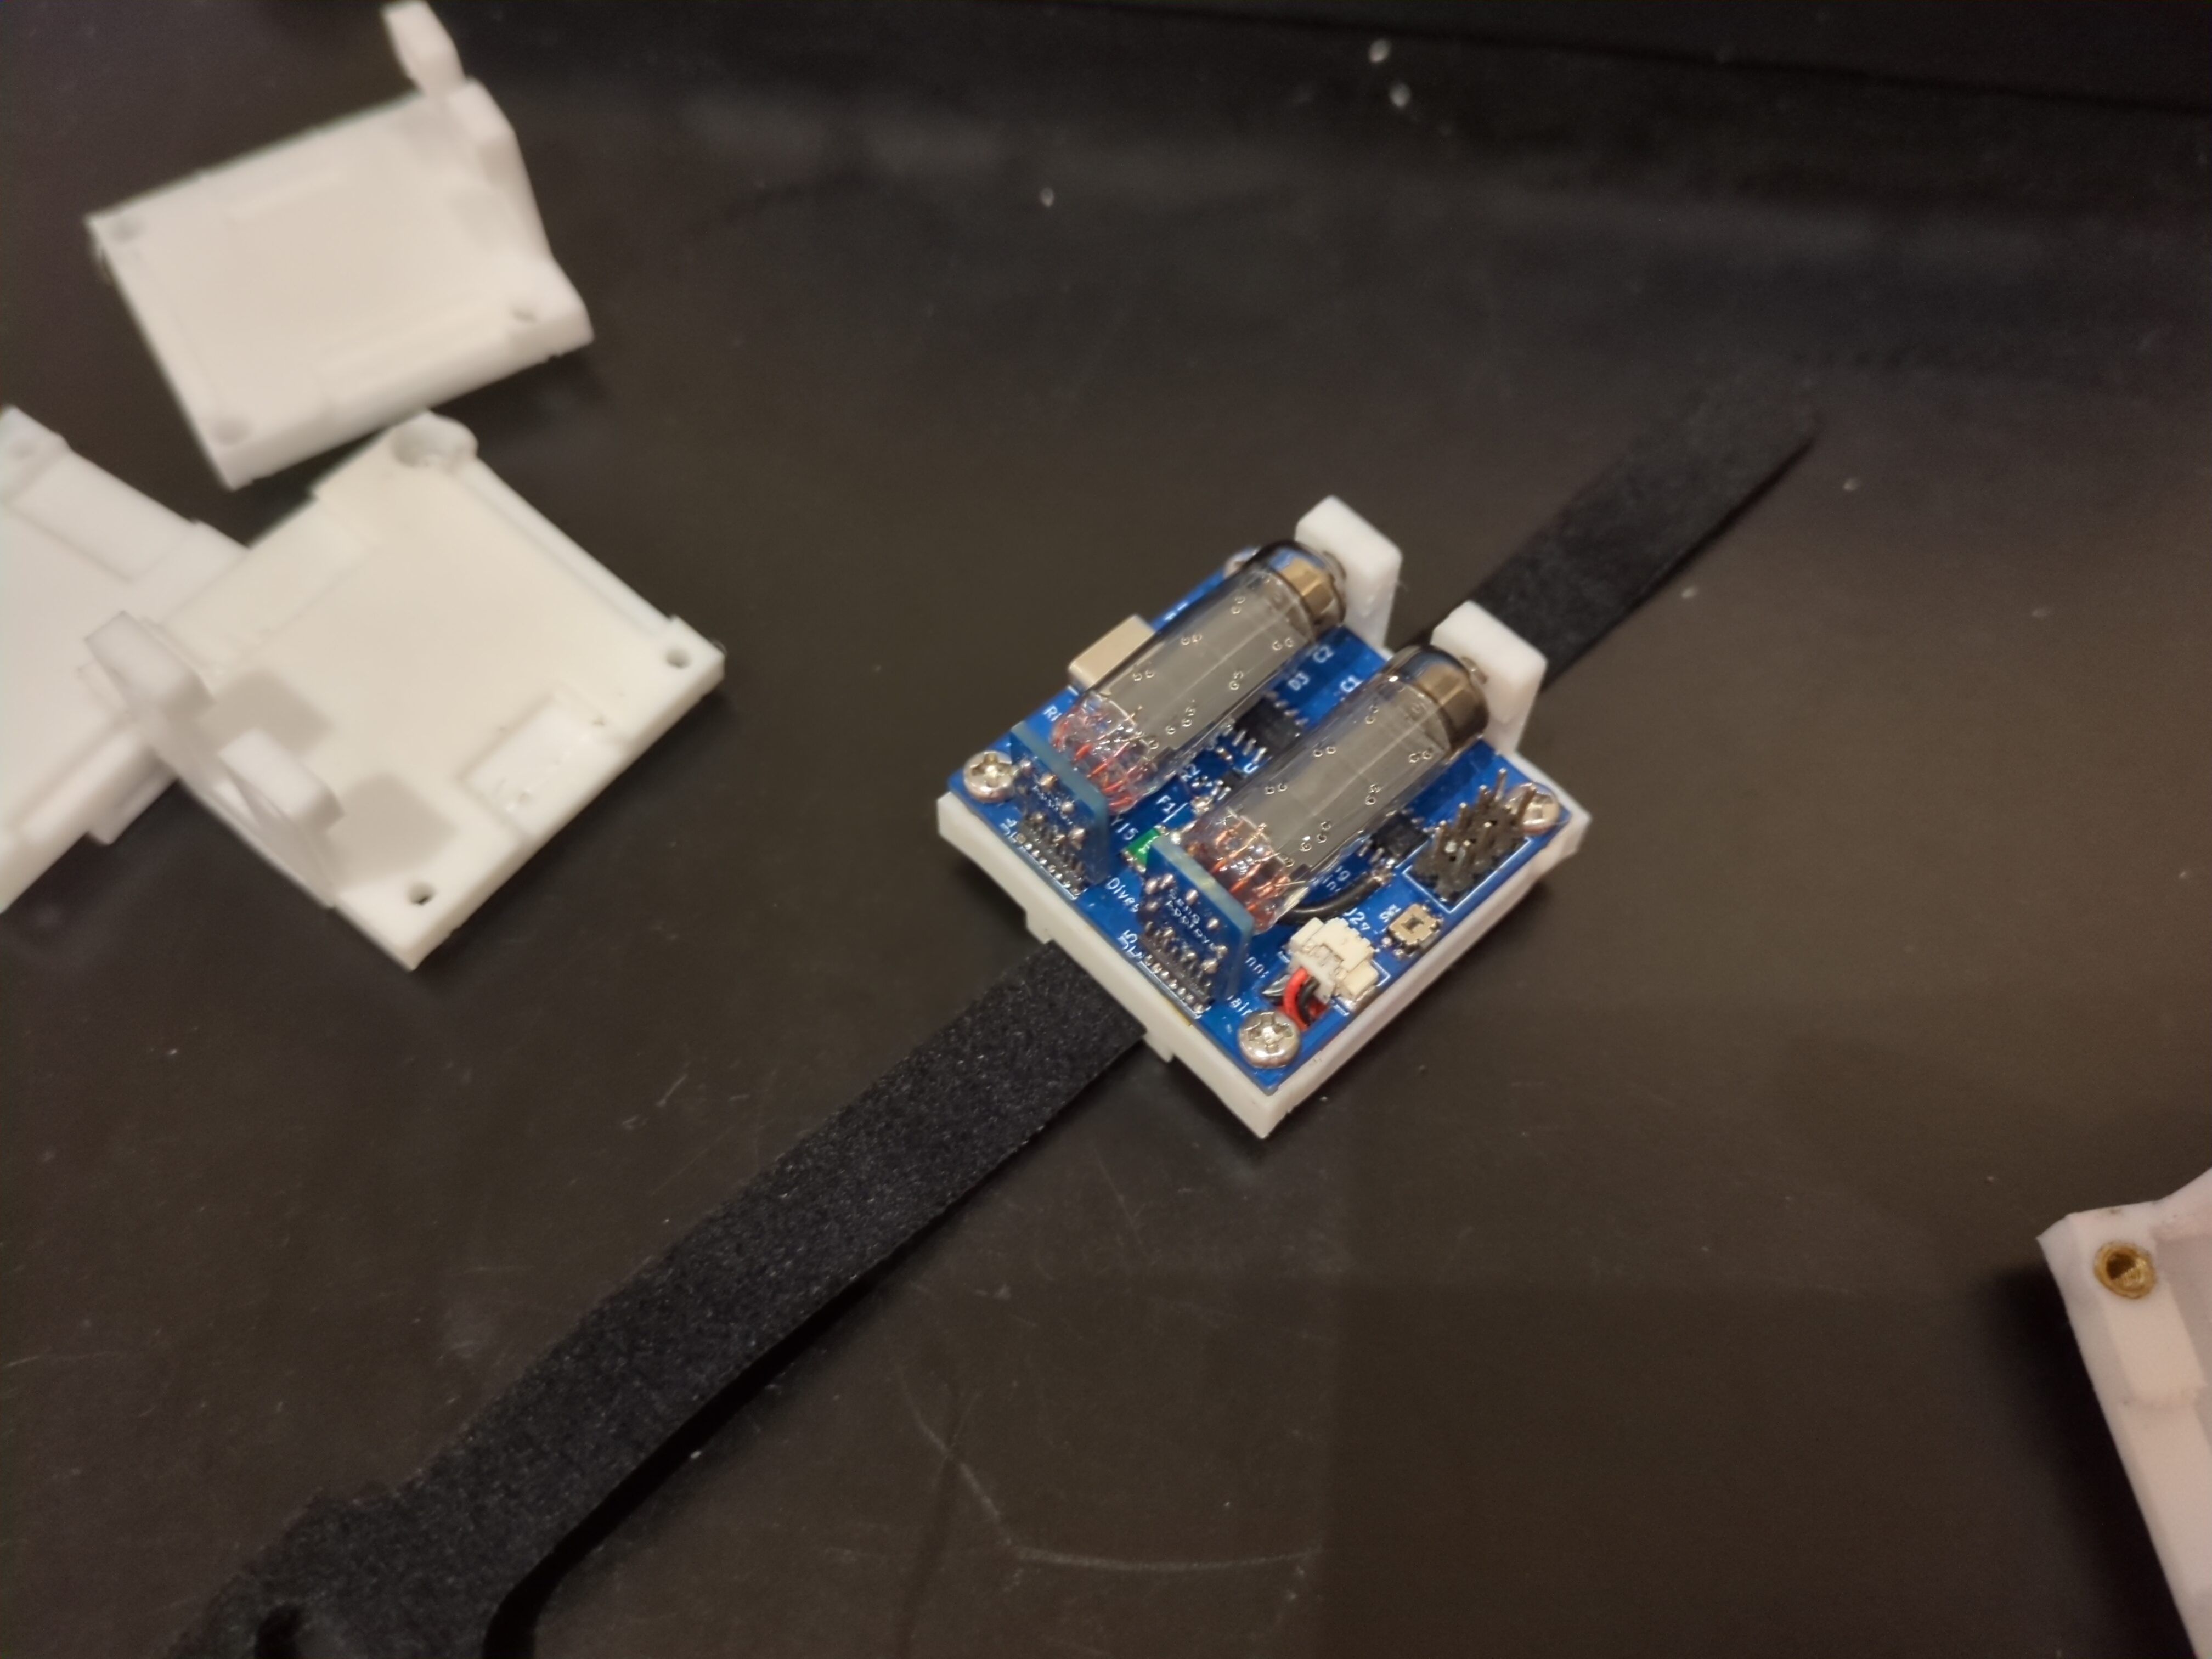
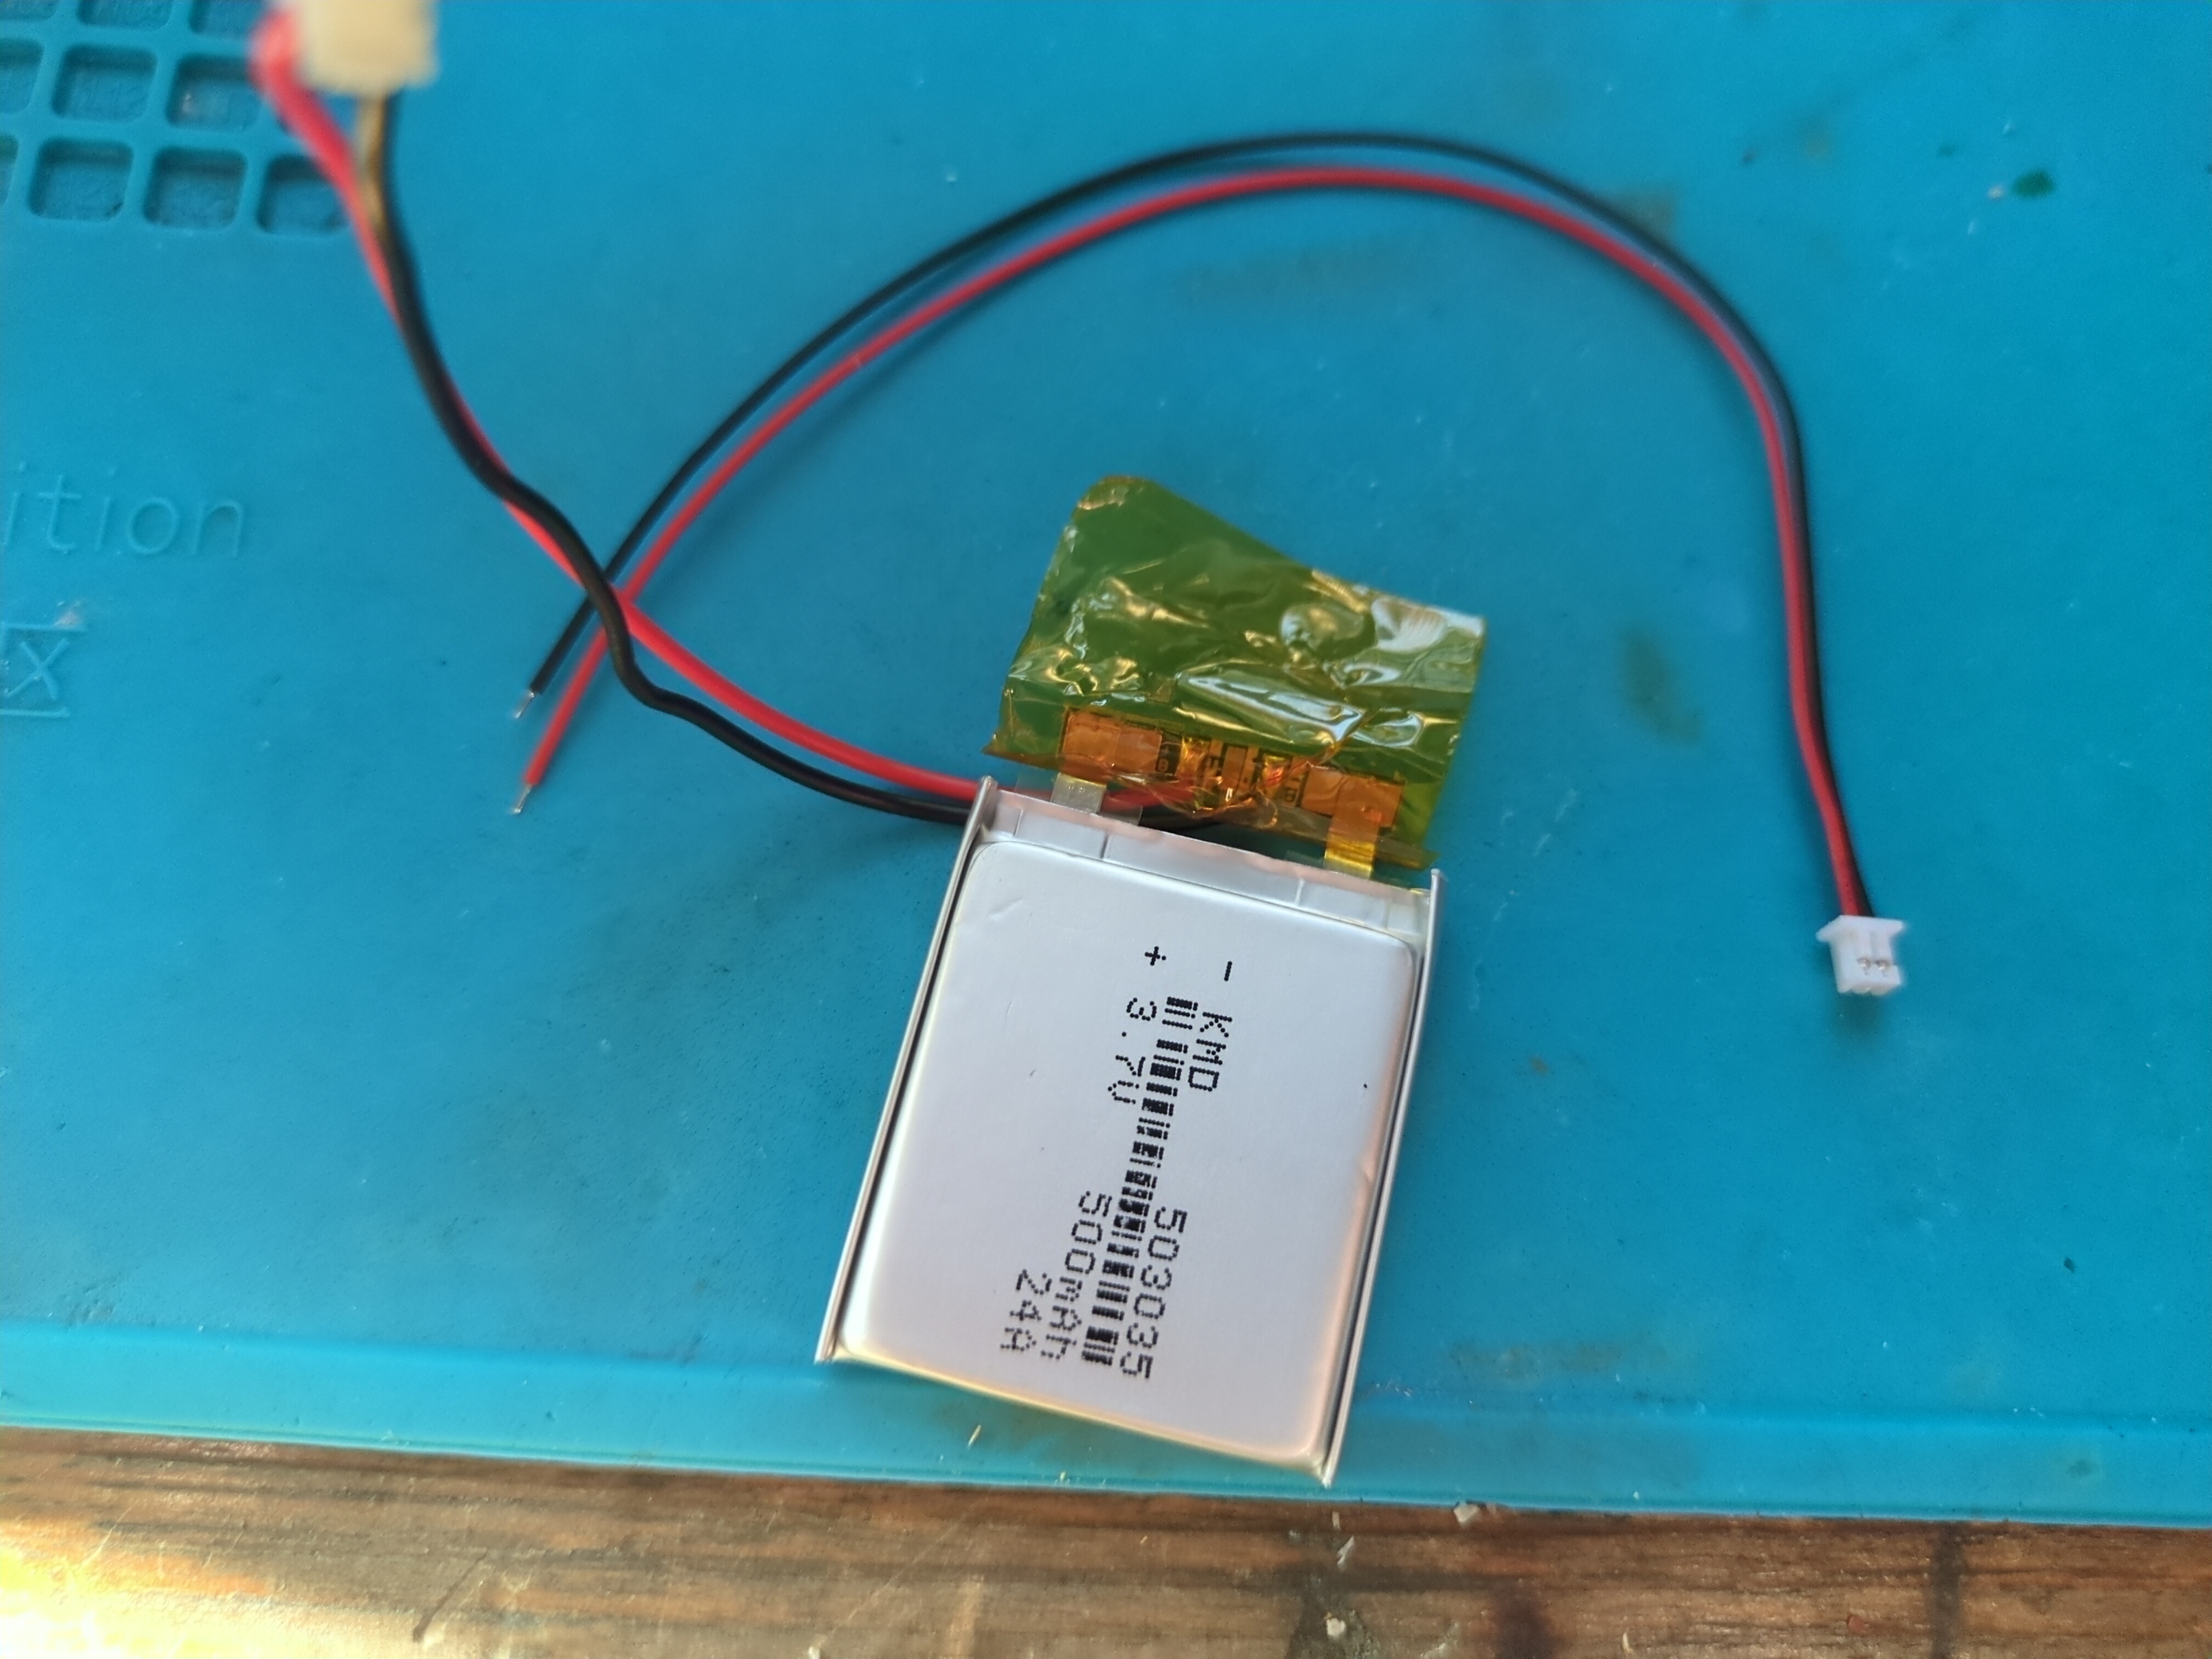
Now after using V1 for a couple days, a socketed design wasn’t going to cut it. A light bump and a tube falls out. You also cannot read anything outside, even when its cloudy. I knew I had to redesign the PCB to use a 4.2V Lipo battery. I went back to KiCad and designed V2. It uses a 1.25mm molex battery connector to get power to the PCB. I also went to Lees Electronics and bought a 500maH battery, but I had to modify it with a new connector. That involved taking it apart, being super careful not to short anything, and resoldering on a new connector:
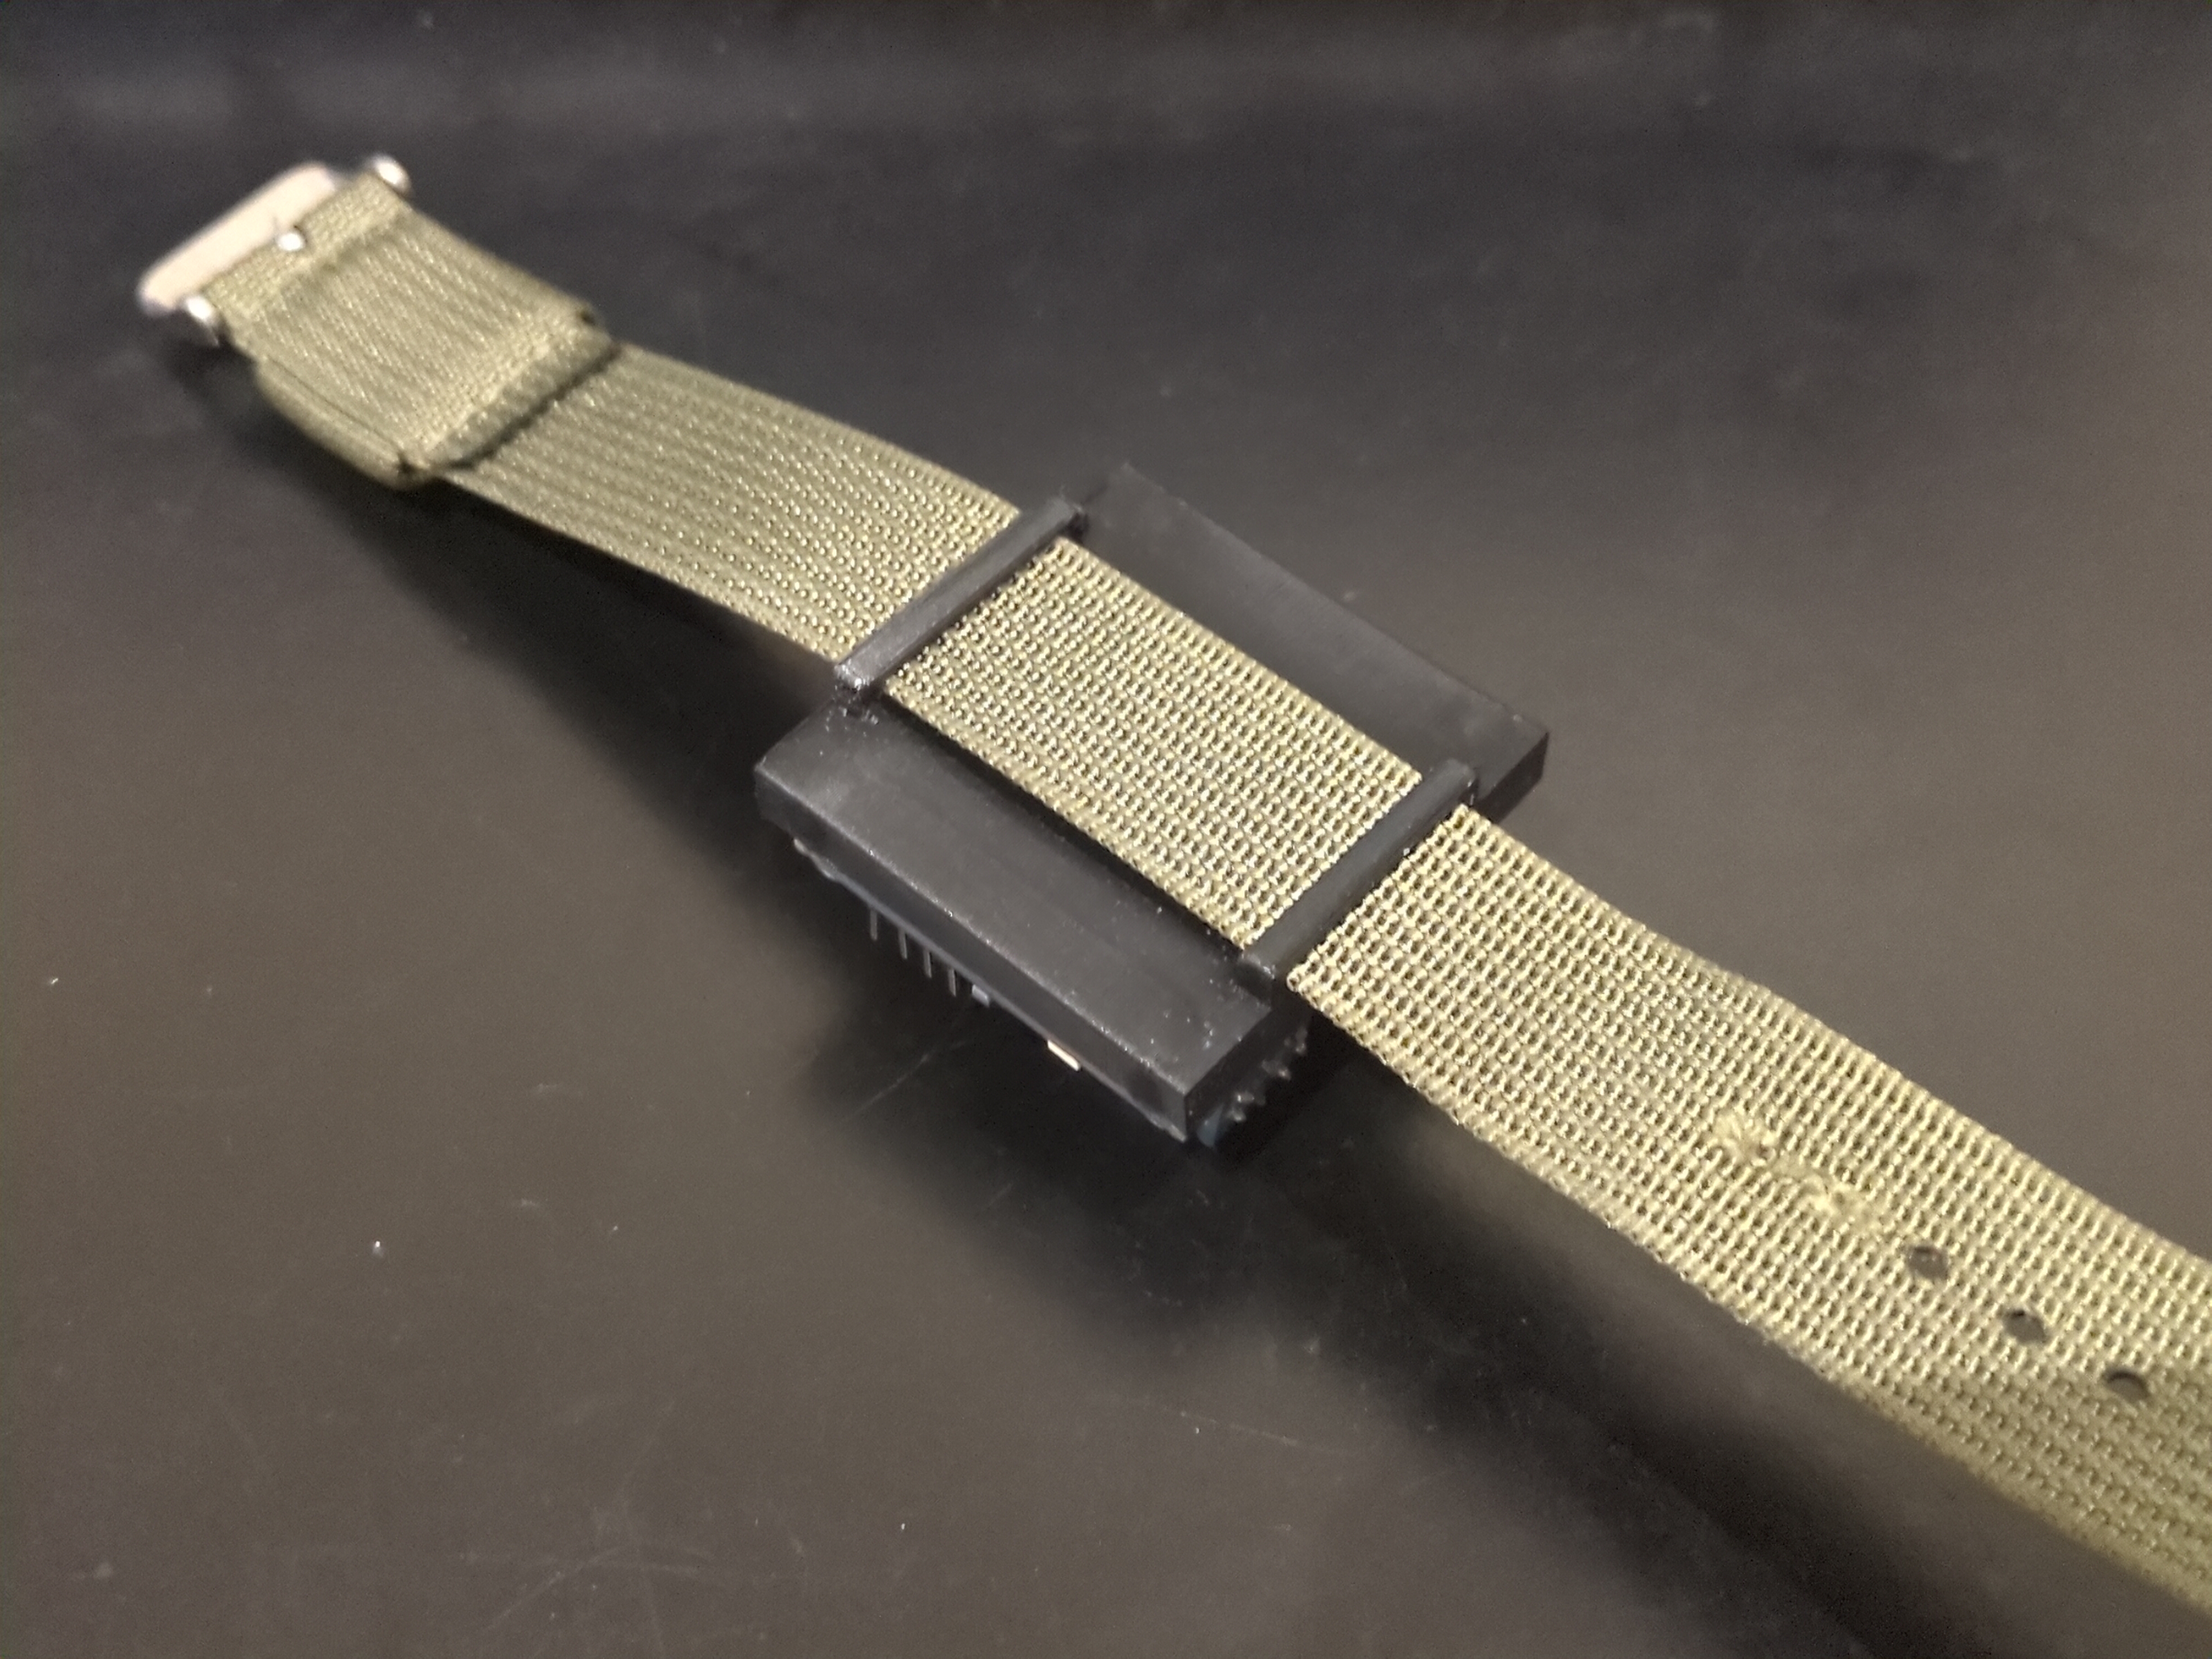
Couple weeks later, the velcro straps loose their grip and fall off. I ordered a single band from Aliexpress and redesigned the enclosure for 20mm. So far no issues. The band was a little big, so I had to make some new holes and cut it shorter. Make sure to burn off the loose end with a blowtorch so the fibers stay together.